예시 여기 이미지 nginx 는 어디서 왔을까?.docker 레지스트리 library 에서 가져온다.
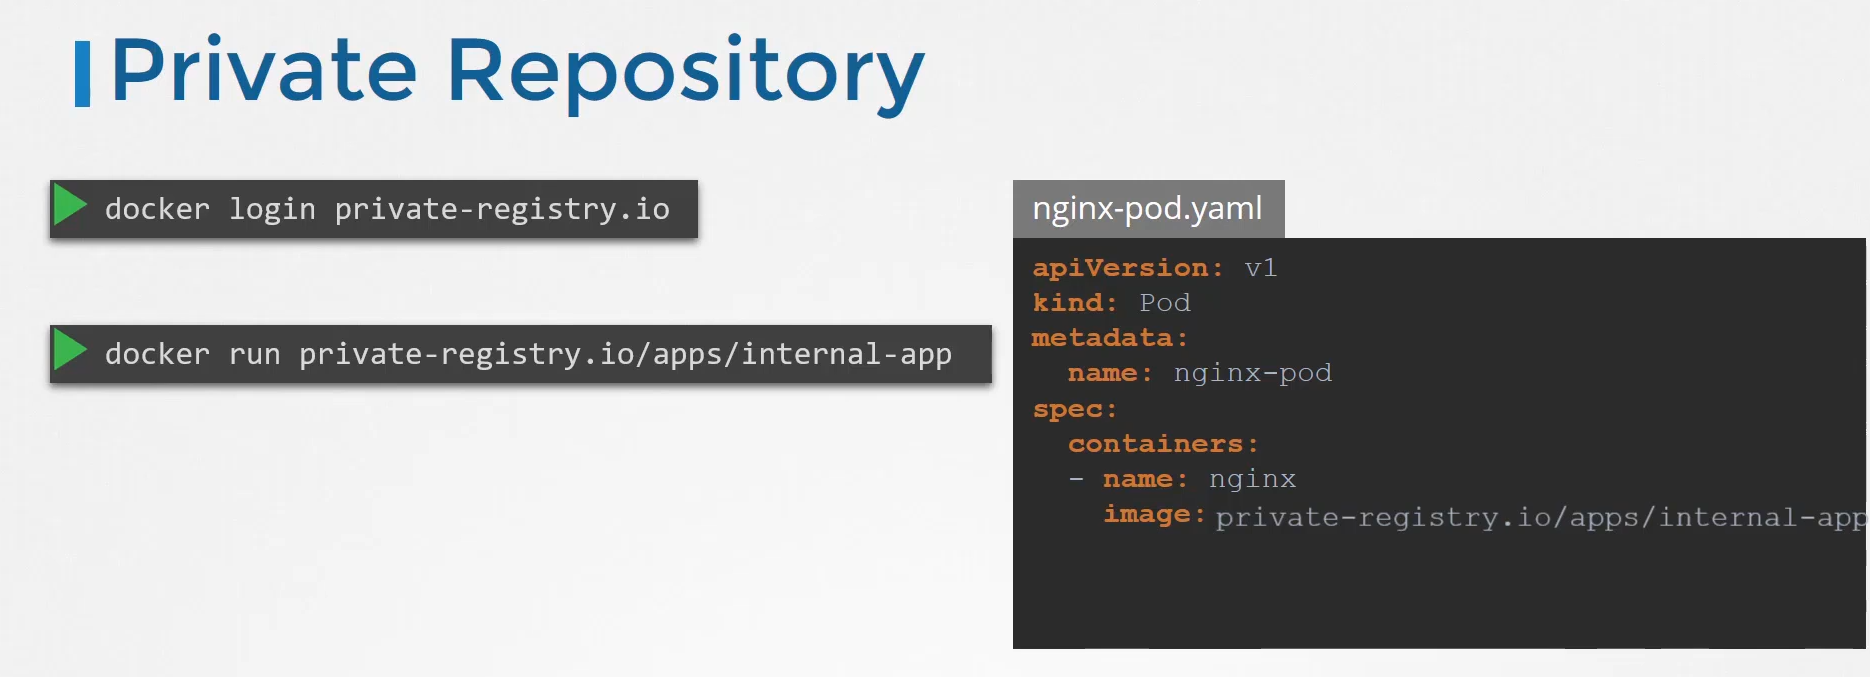
Private Repository
private 레포지토리에서 가져올 수 있다.
먼저 private-registry.io 에 로그인 해야한다.
image 에 전체 경로를 써야한다.
쿠버네티스가 어떻게 private 레포지토리에 인증할 수 있을까?
워커노드의 도커 런타임에 어떻게 인증을 전달할 수 있을까 ?
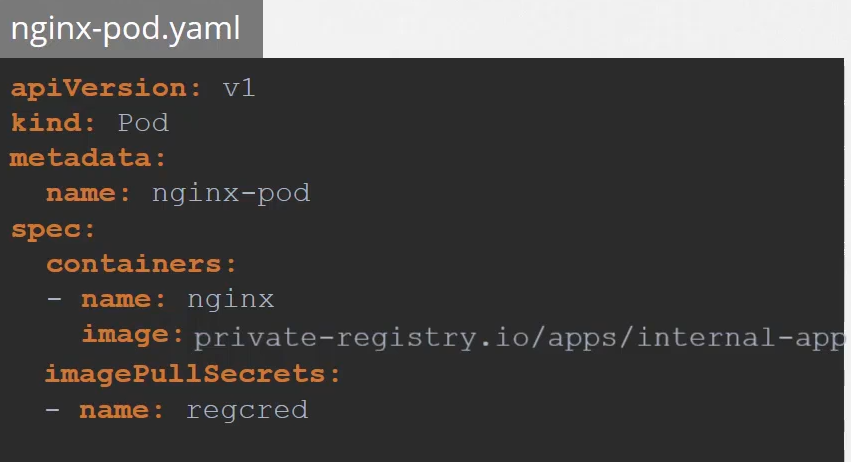
-> secret 을 이용한다.
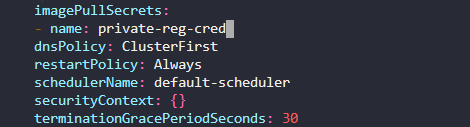
파드 정의에 secret이 들어간다.
168. Practice Test - Image Security
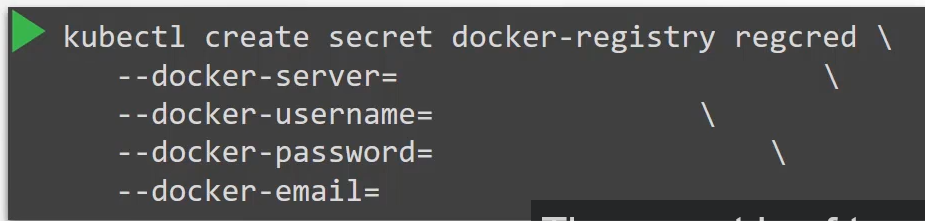
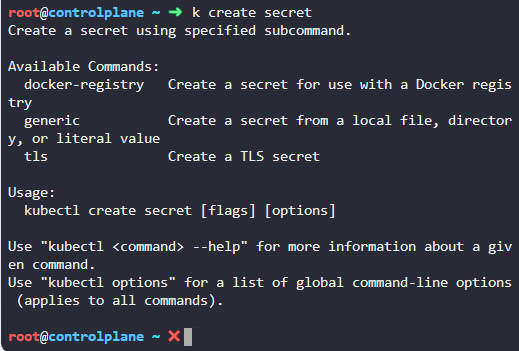
1. What secret type must we choose fordocker registry?
docker-registry 를 사용한다.
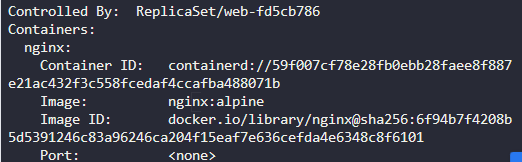
2. We have an application running on our cluster. Let us explore it first. What image is the application using?
nginx 알파인
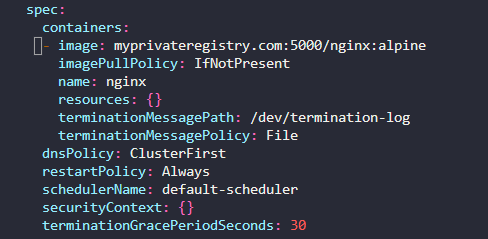
3. We decided to use a modified version of the application from an internal private registry. Update the image of the deployment to use a new image frommyprivateregistry.com:5000
The registry is located atmyprivateregistry.com:5000. Don't worry about the credentials for now. We will configure them in the upcoming steps.
image 앞에 경로를 추가
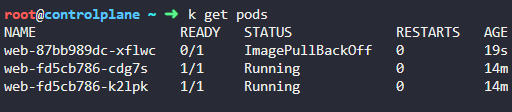
4. Are the new PODs created with the new images successfully running?
작동 안된다 credential 문제인듯
5.
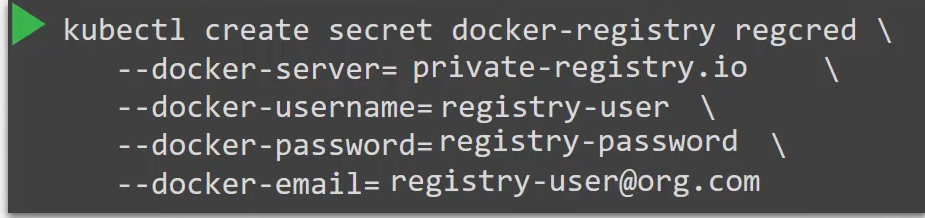
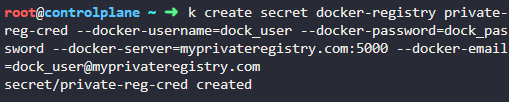
Create a secret object with the credentials required to access the registry.
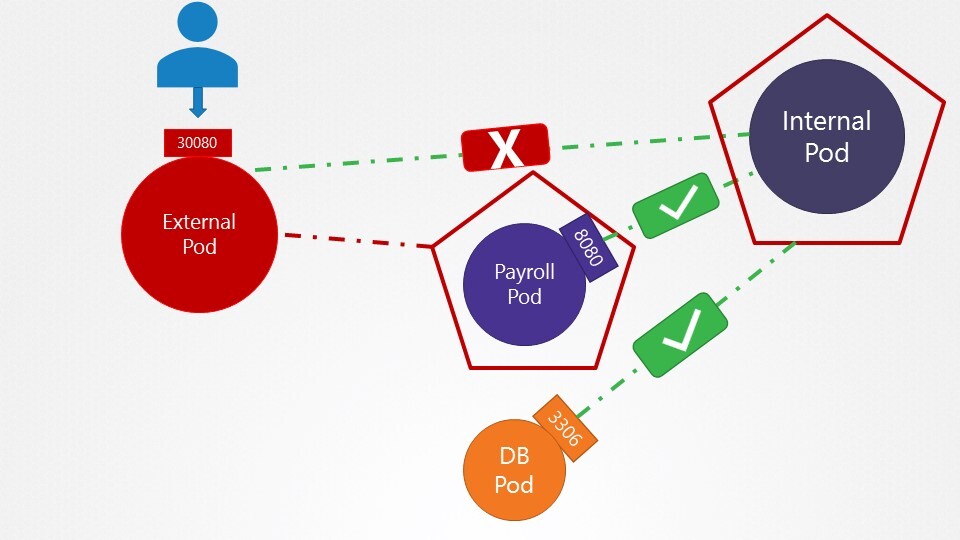
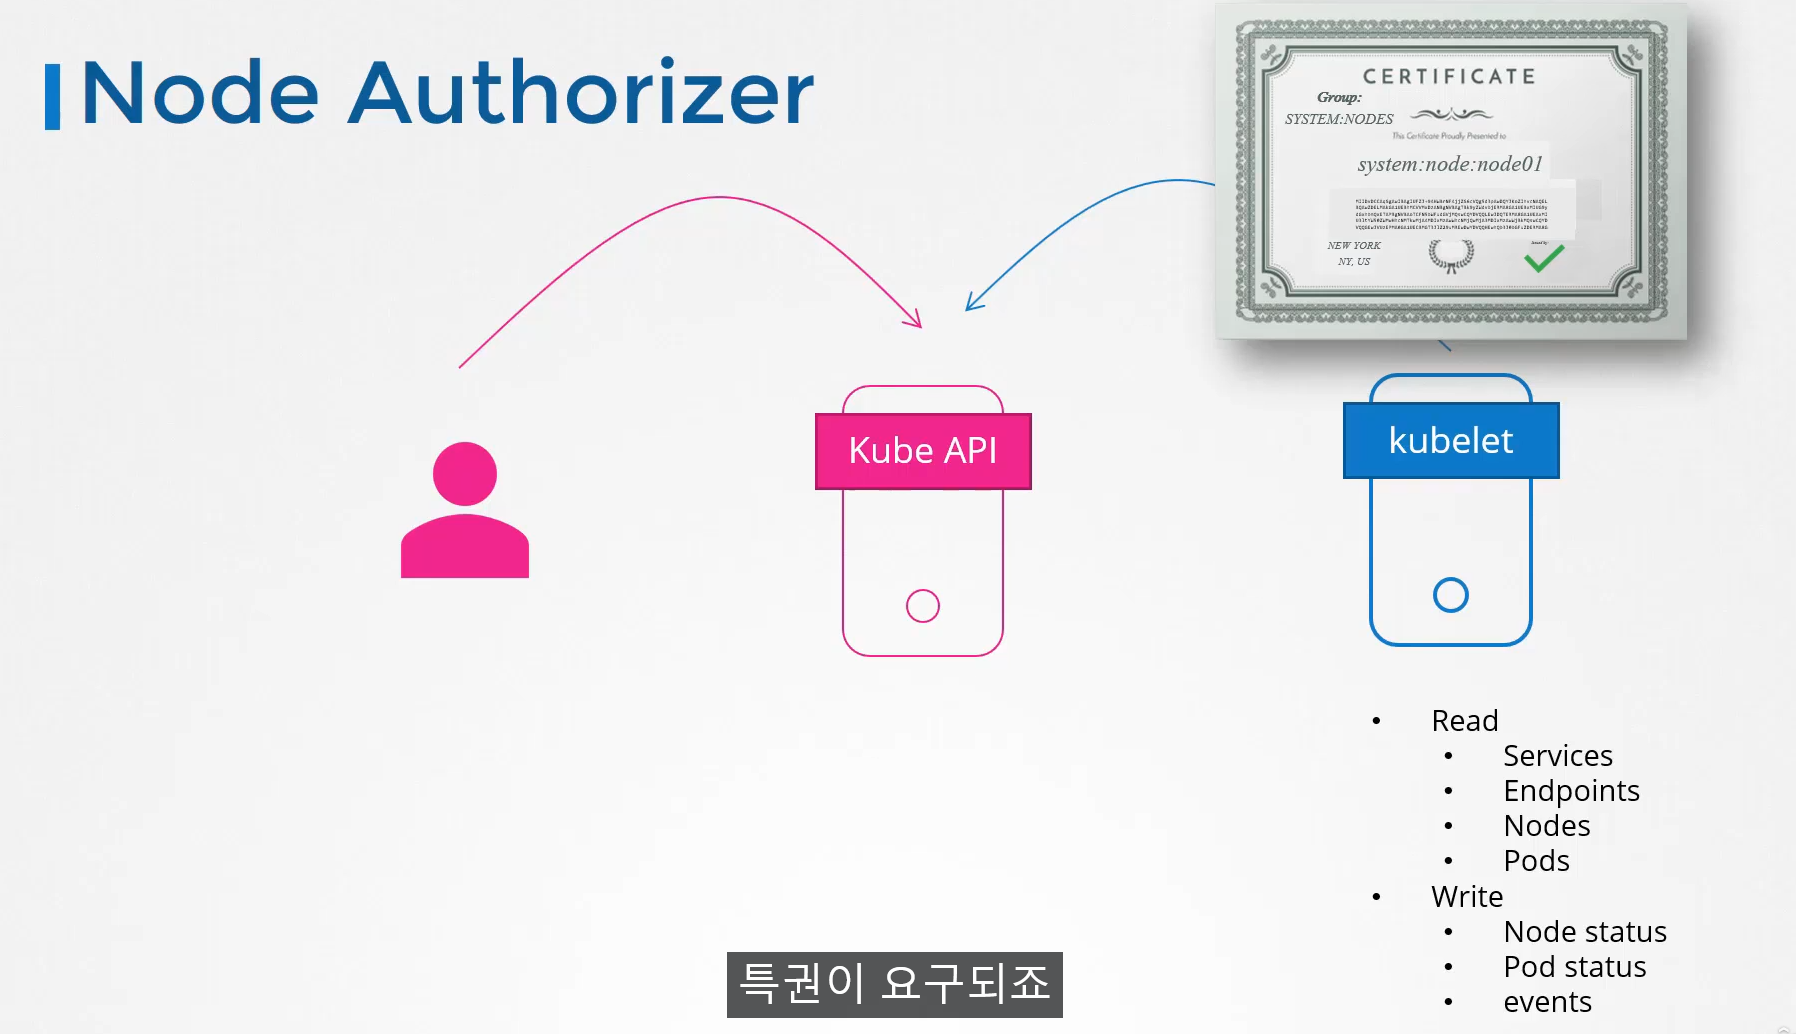
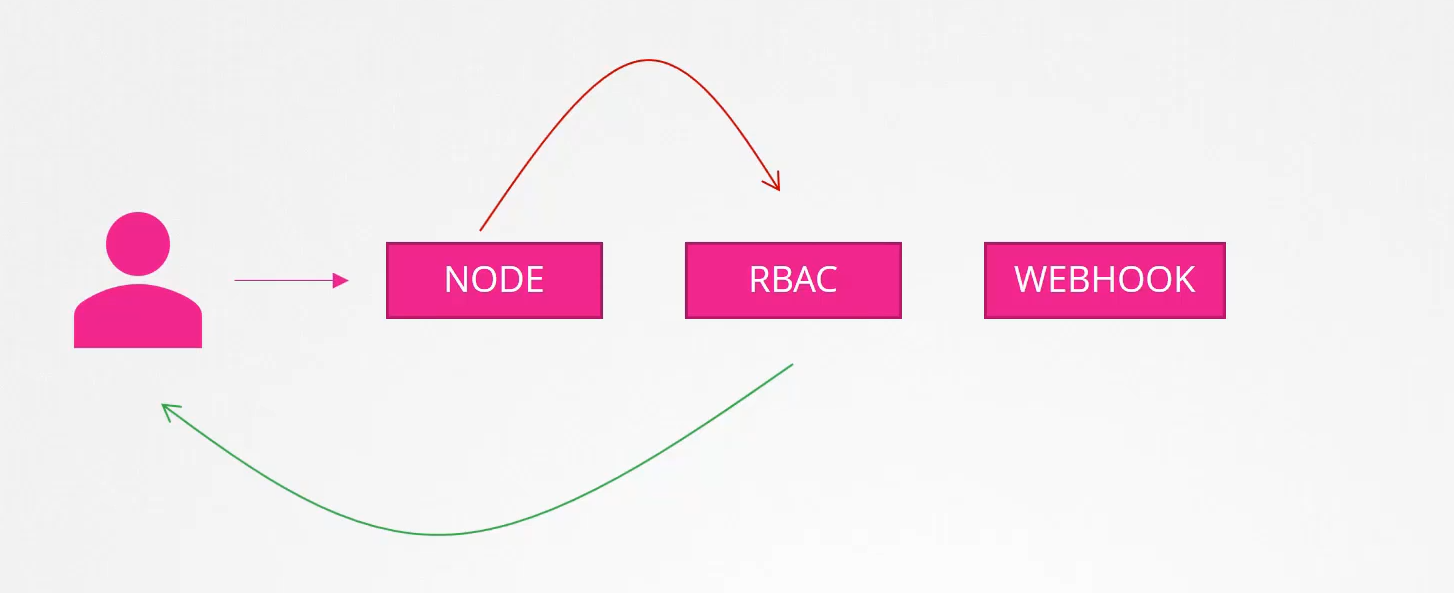
kubelet 이 정보를 요청할 때 kubeapi 에 인증을 했기 때문에 kube api 가 응답하는 것이다.
해당 승인을 하는 곳이 node Authorizer 이다.
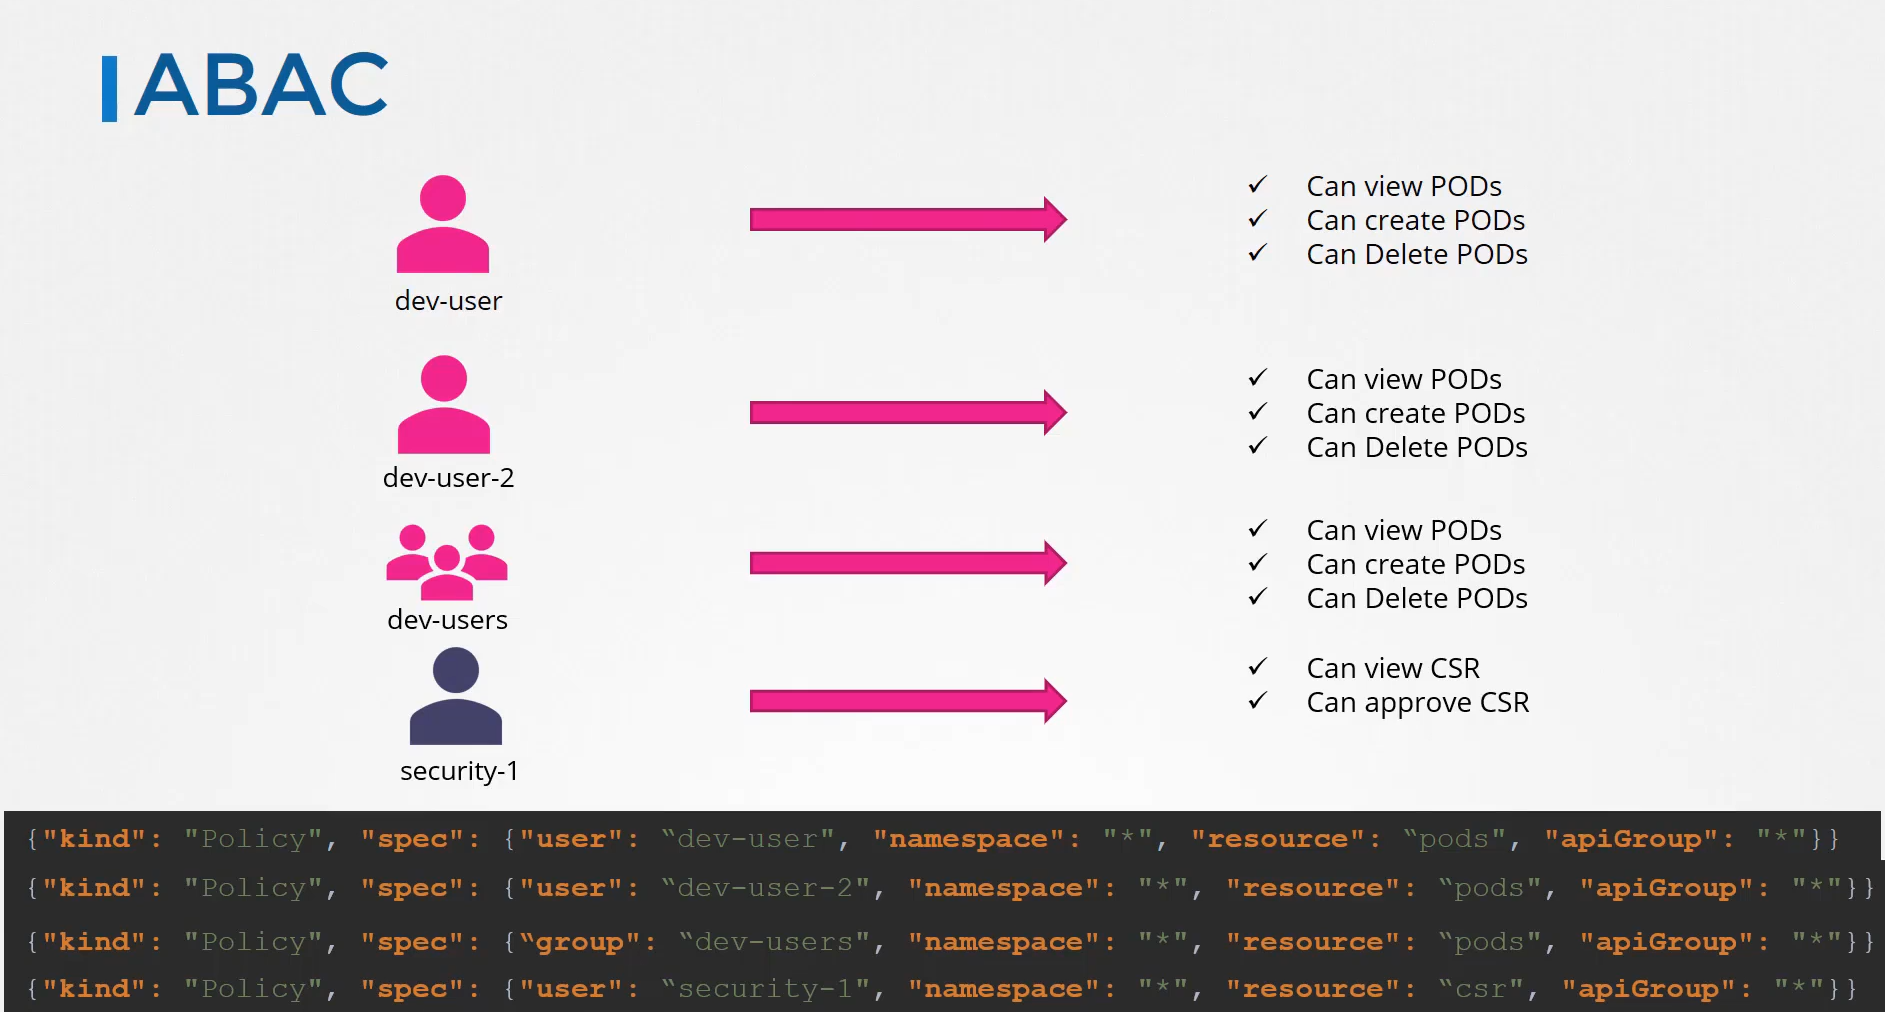
ABAC - 특성 기반 승인
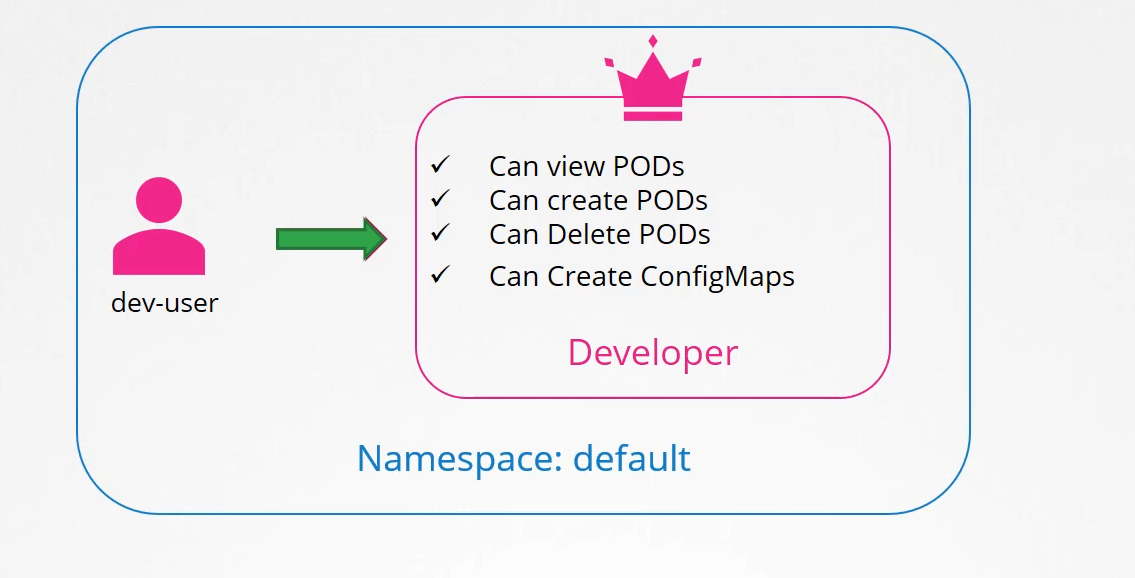
사용자를 추가시켜서 권한을 부여한다.
당연히 일일히 수동으로 추가하면 귀찮으니까 ...
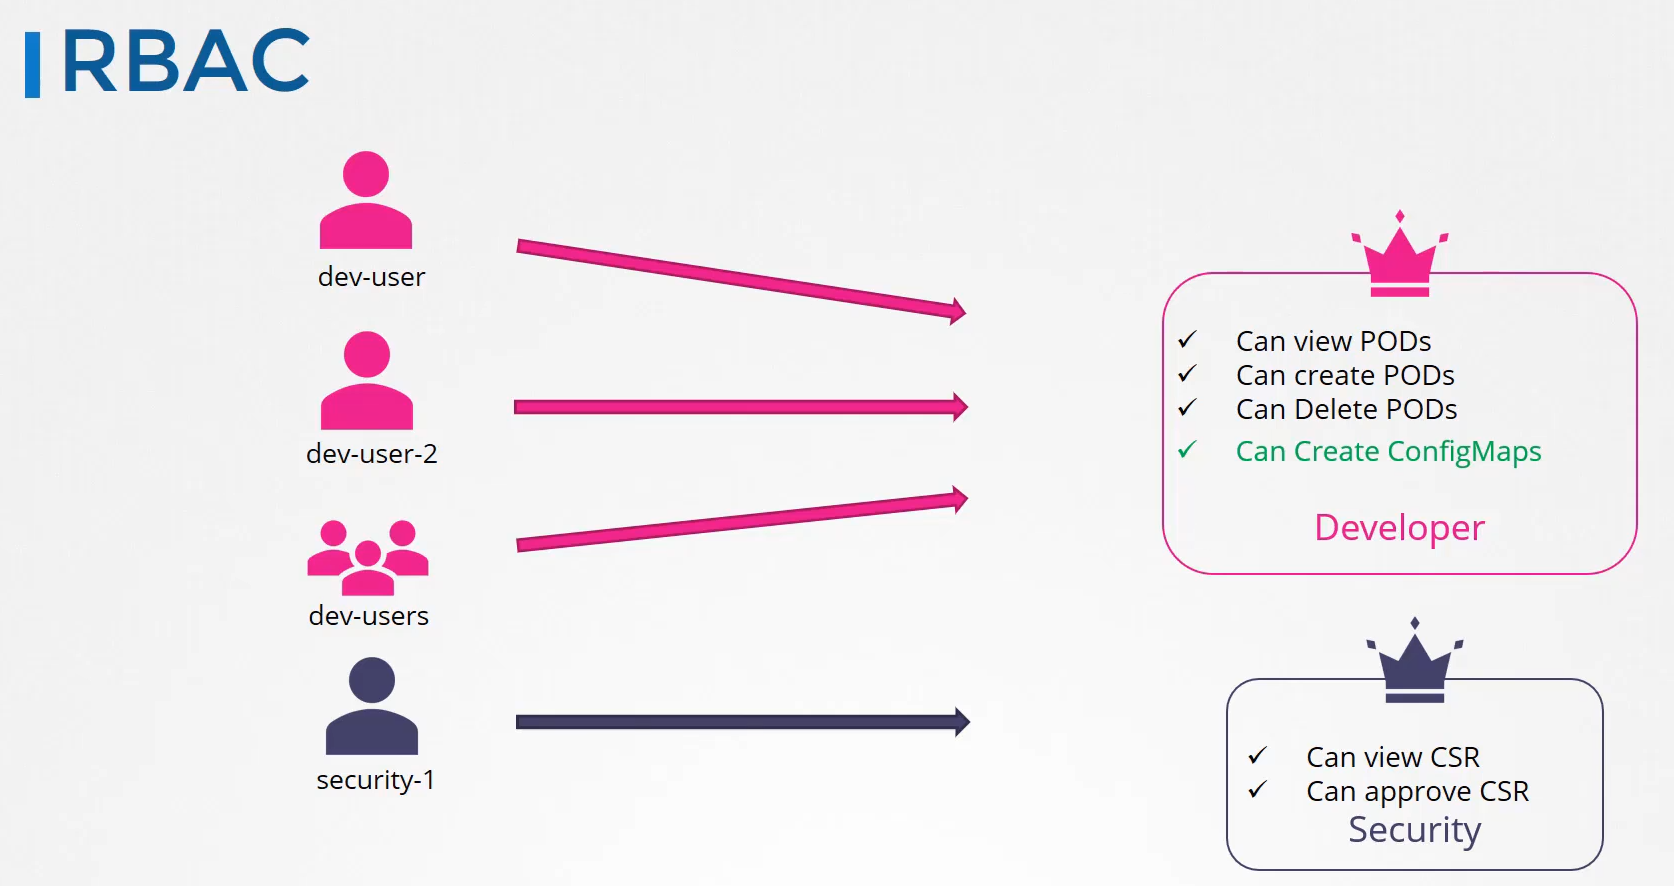
RBAC - 역할 기반 인증
역할 기반으로 하면 좀 더 쉽게 권한 제어가 가능하다.
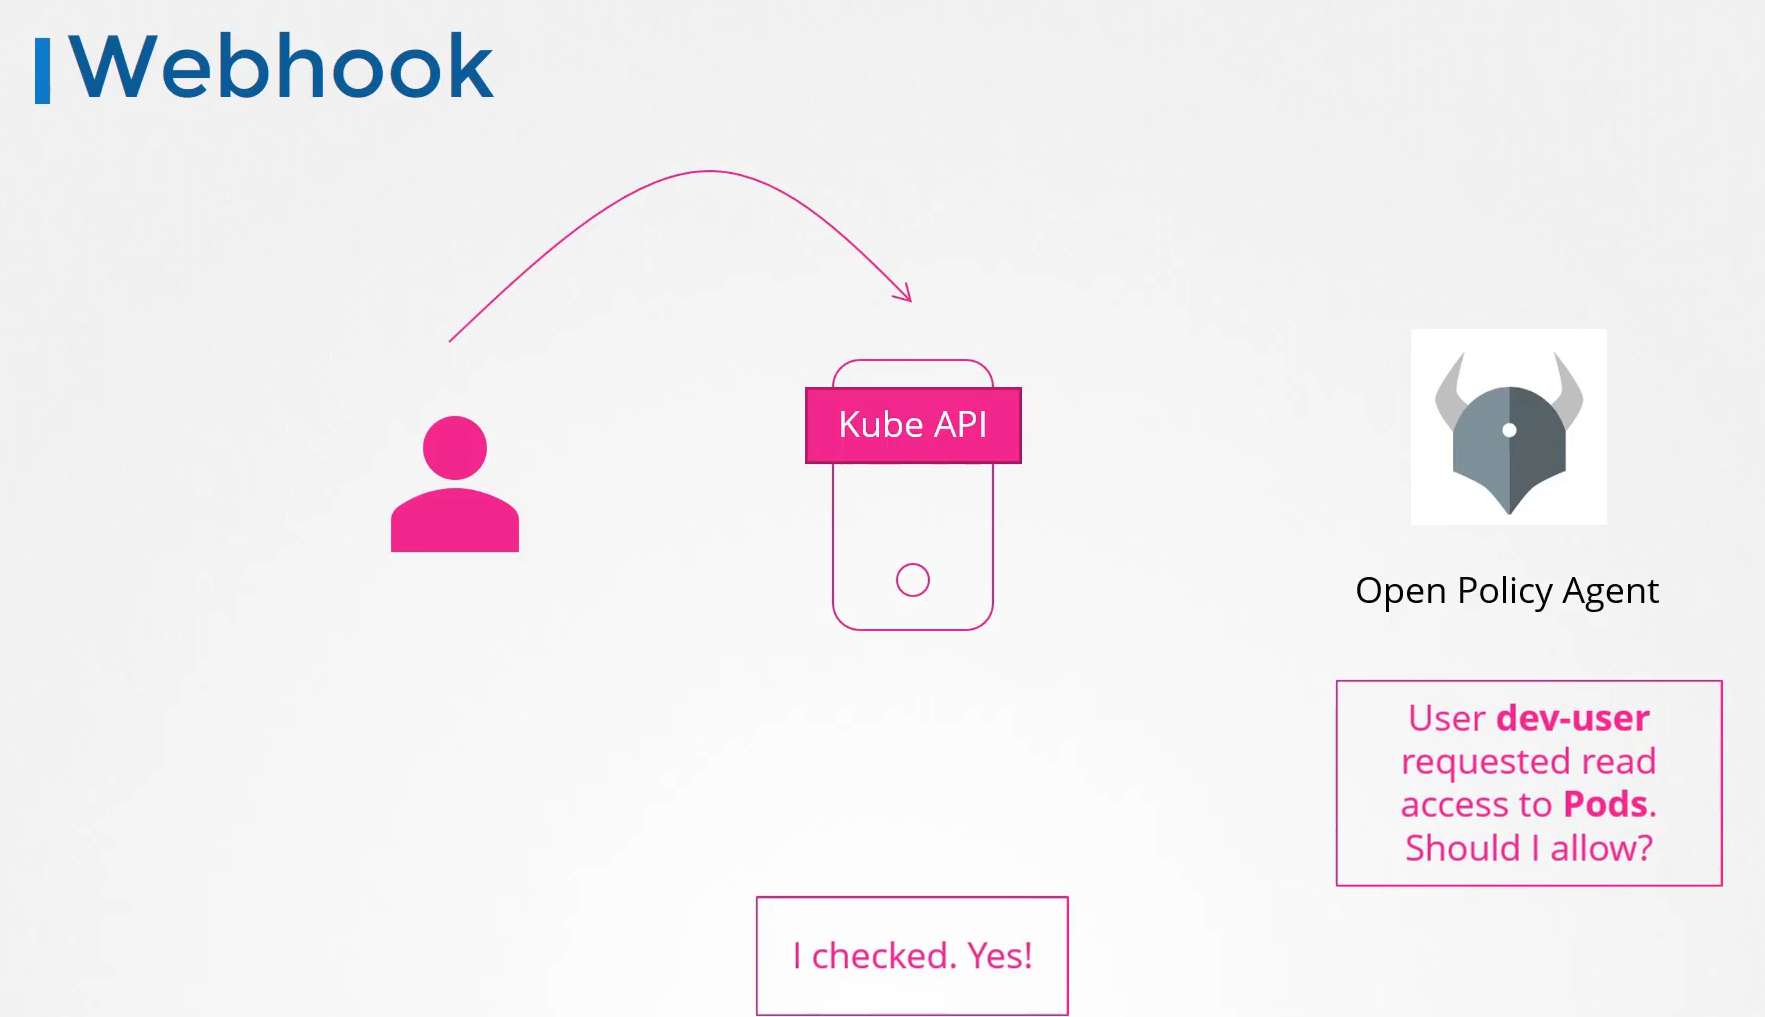
Webhook
외부에서 권한 제어를 하고 싶다면 ?
Open Policy Agent 가 권한을 체크해준다.
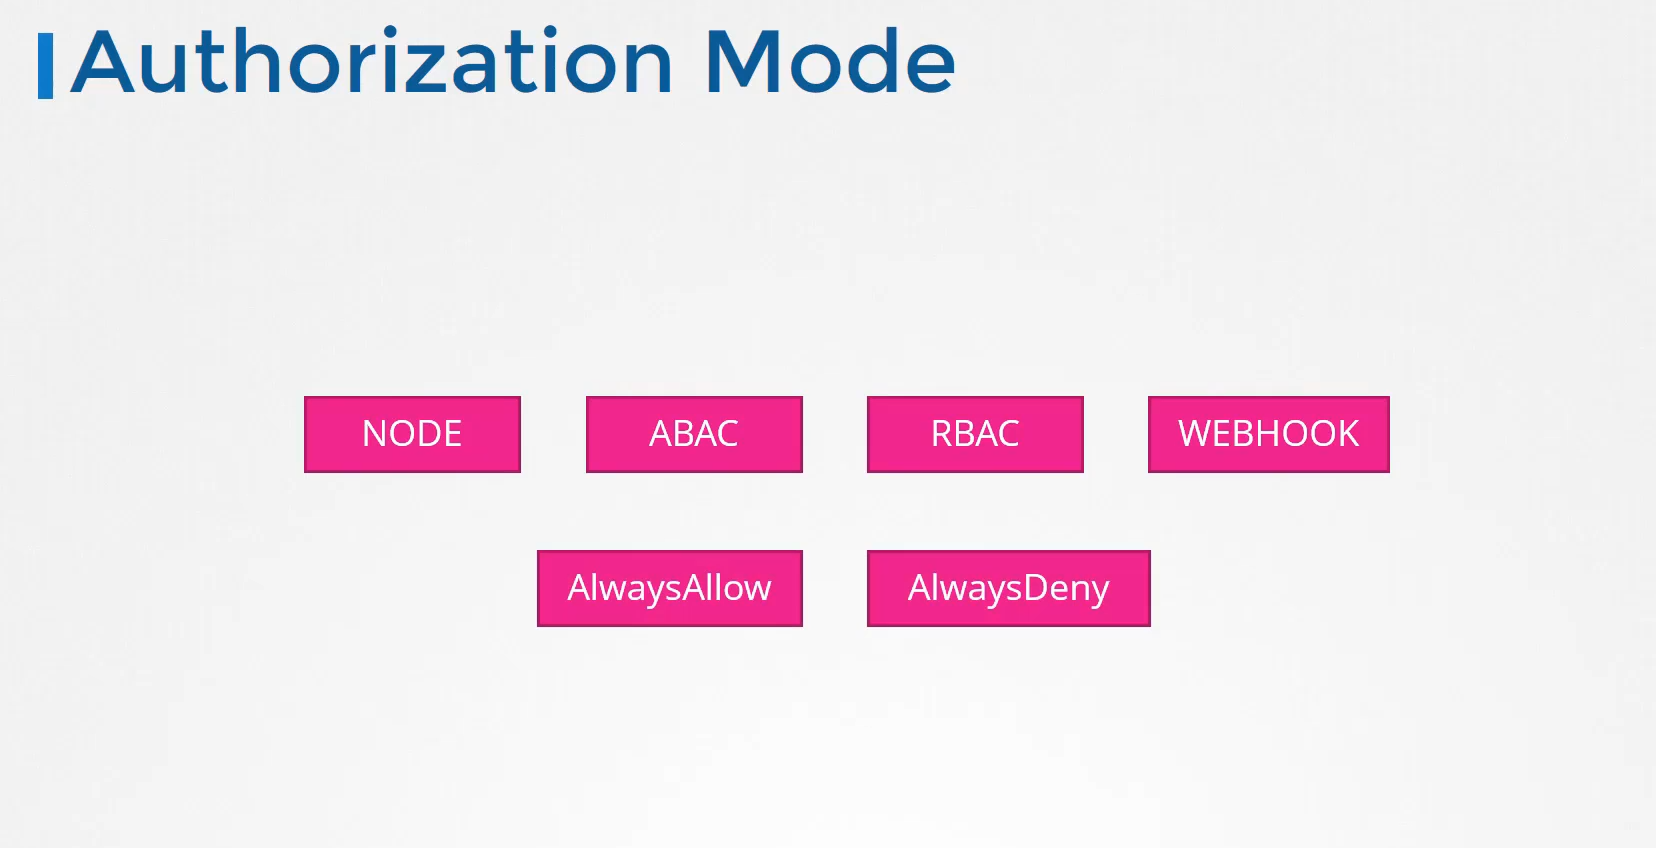
Authorization Mode
AlwaysAllow, AlwaysDeny 이 두가지가 있다.
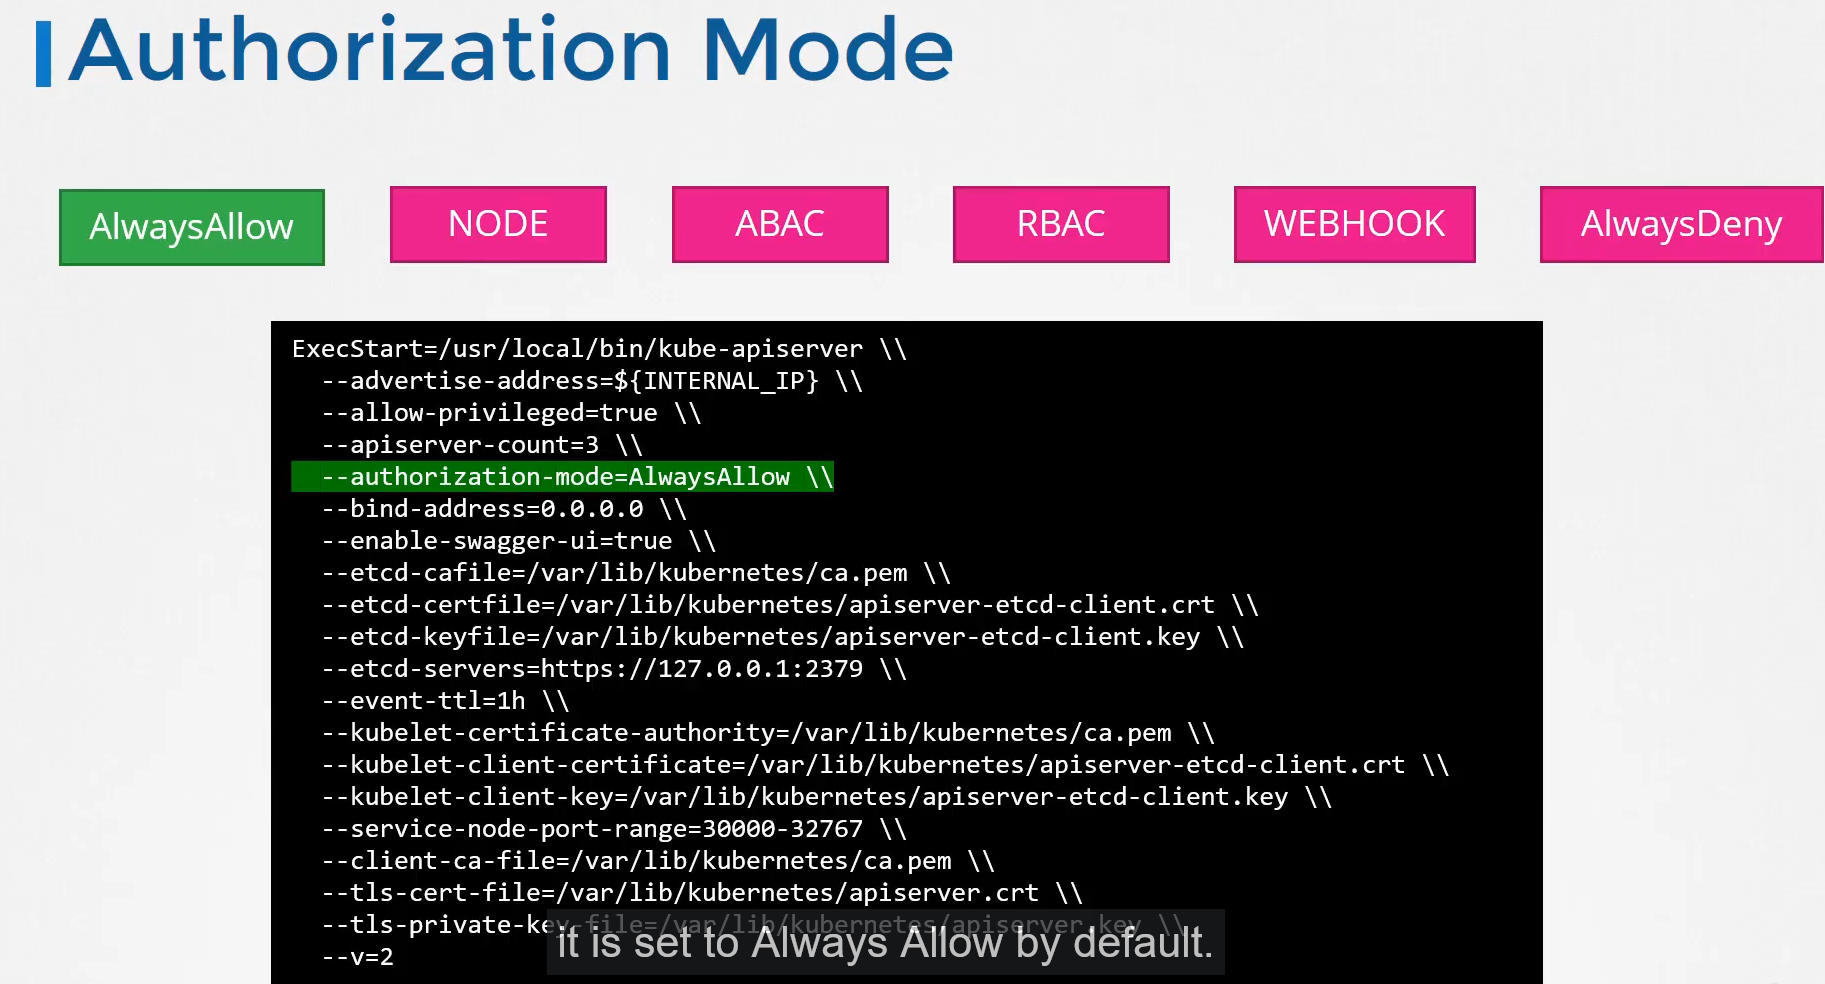
kubeapiserver를 보면 authorization 을 확인할 수 있다.
default 는 always allow 이다.
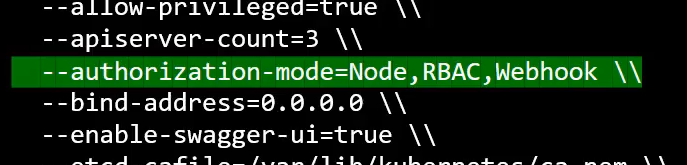
멀티플 모드도 가능하다.
하나가 거부되면 다음 모드에서 확인하고 승인되면 넘겨준다.
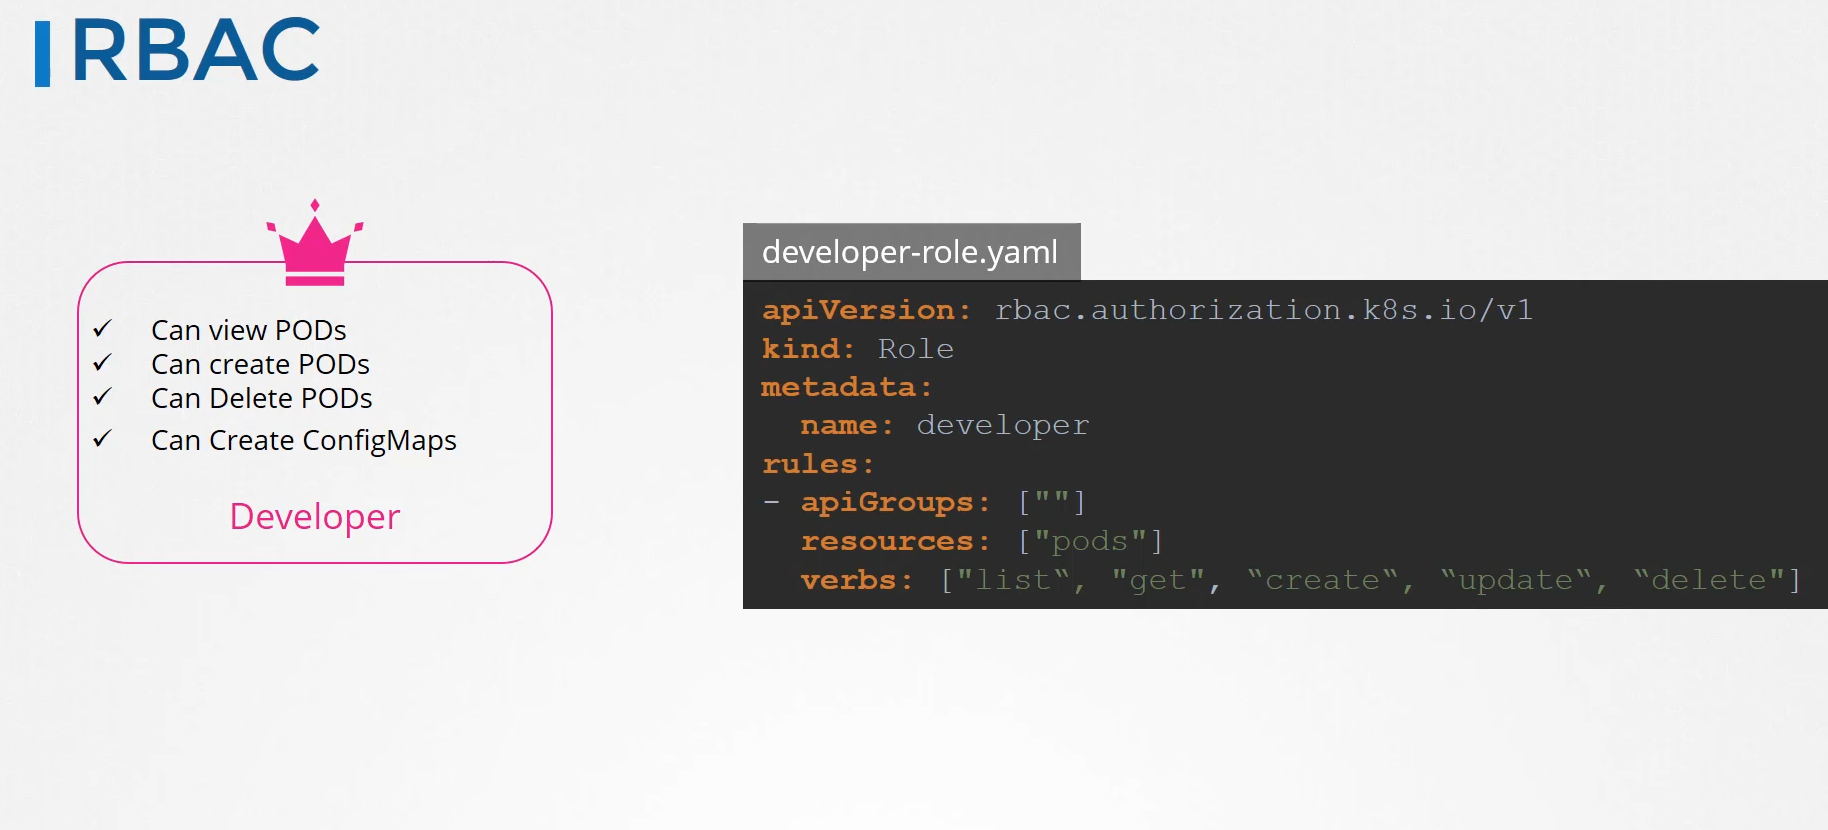
159. Role Based Access Control
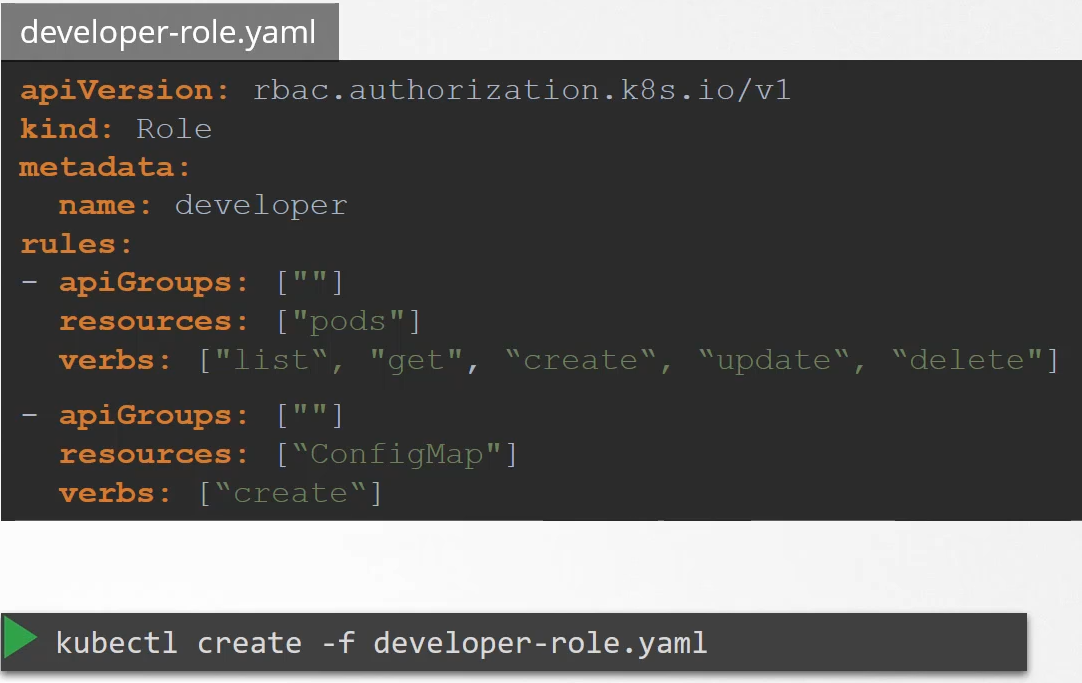
역할을 생성해보자!
rule을 여러개 추가할 수도 있다.
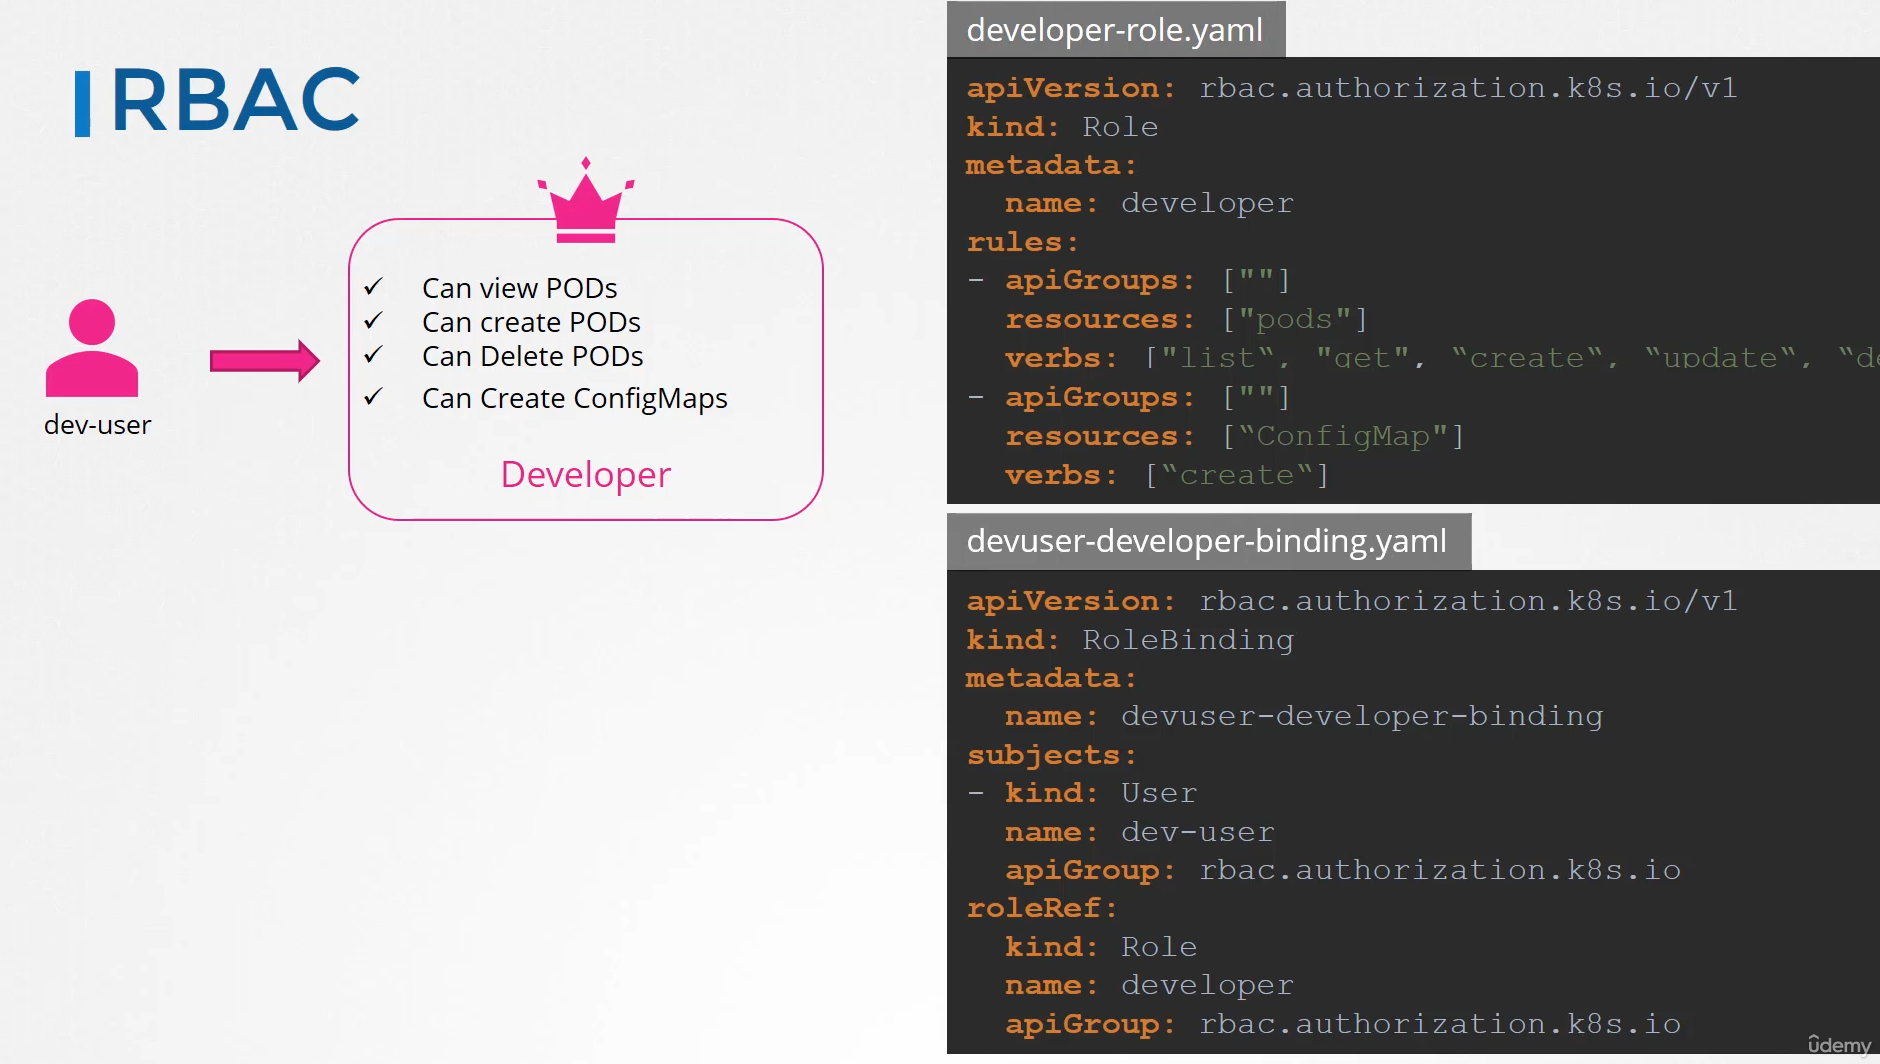
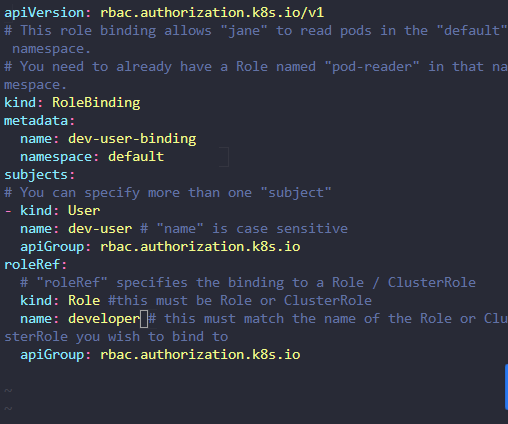
RoleBinding Object
생성한 역할을 쓰기 위해 rolebinding 객체를 생성해야한다.
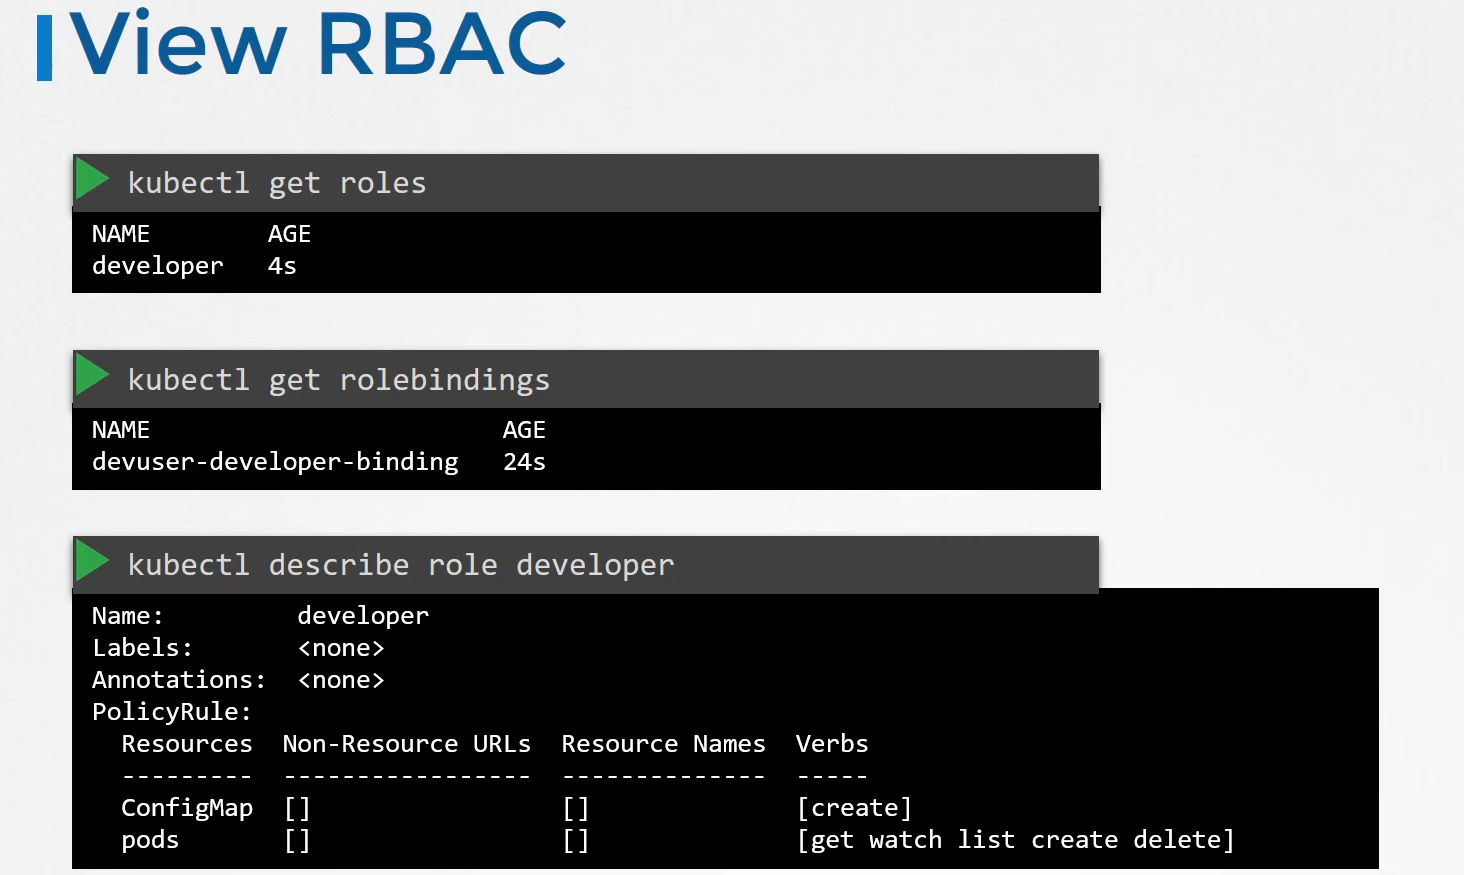
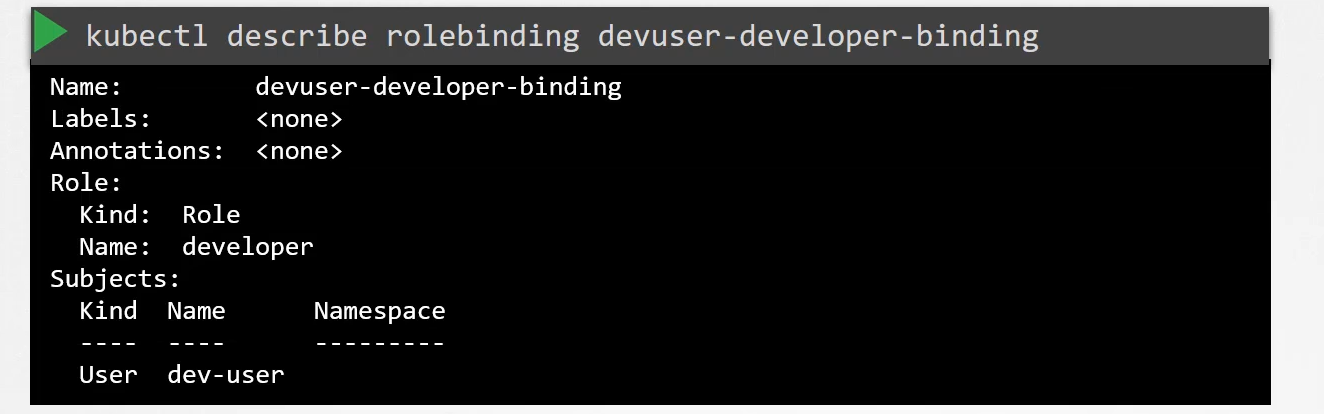
View RBAC
해당 명령어로 role 확인
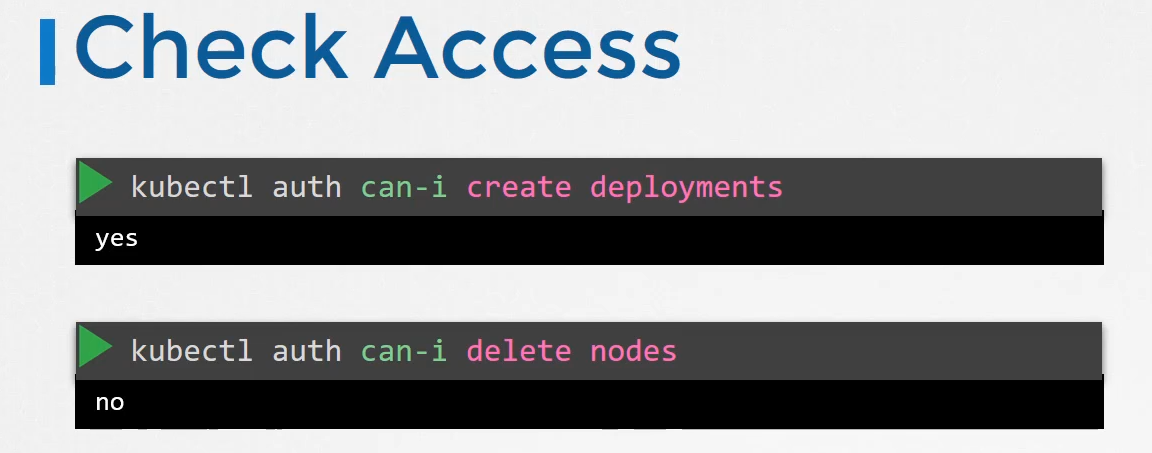
Check Access - can-i
can i 명령어로 체크할 수 있다.
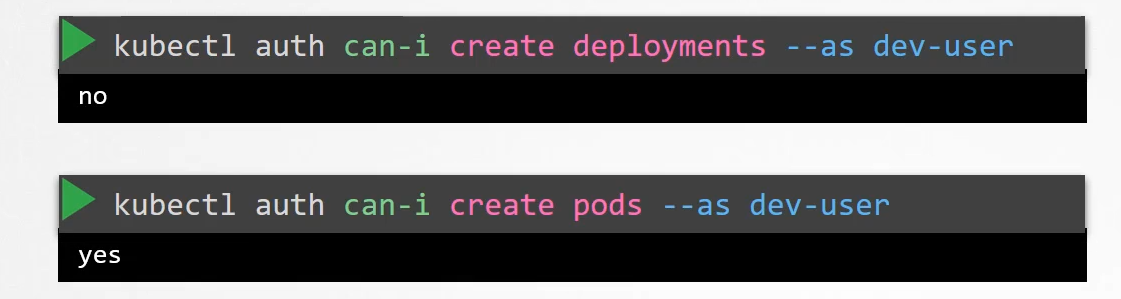
--as user 옵션으로 해당 유저의 권한을 체크할 수 있다.
ns 도 기입 가능
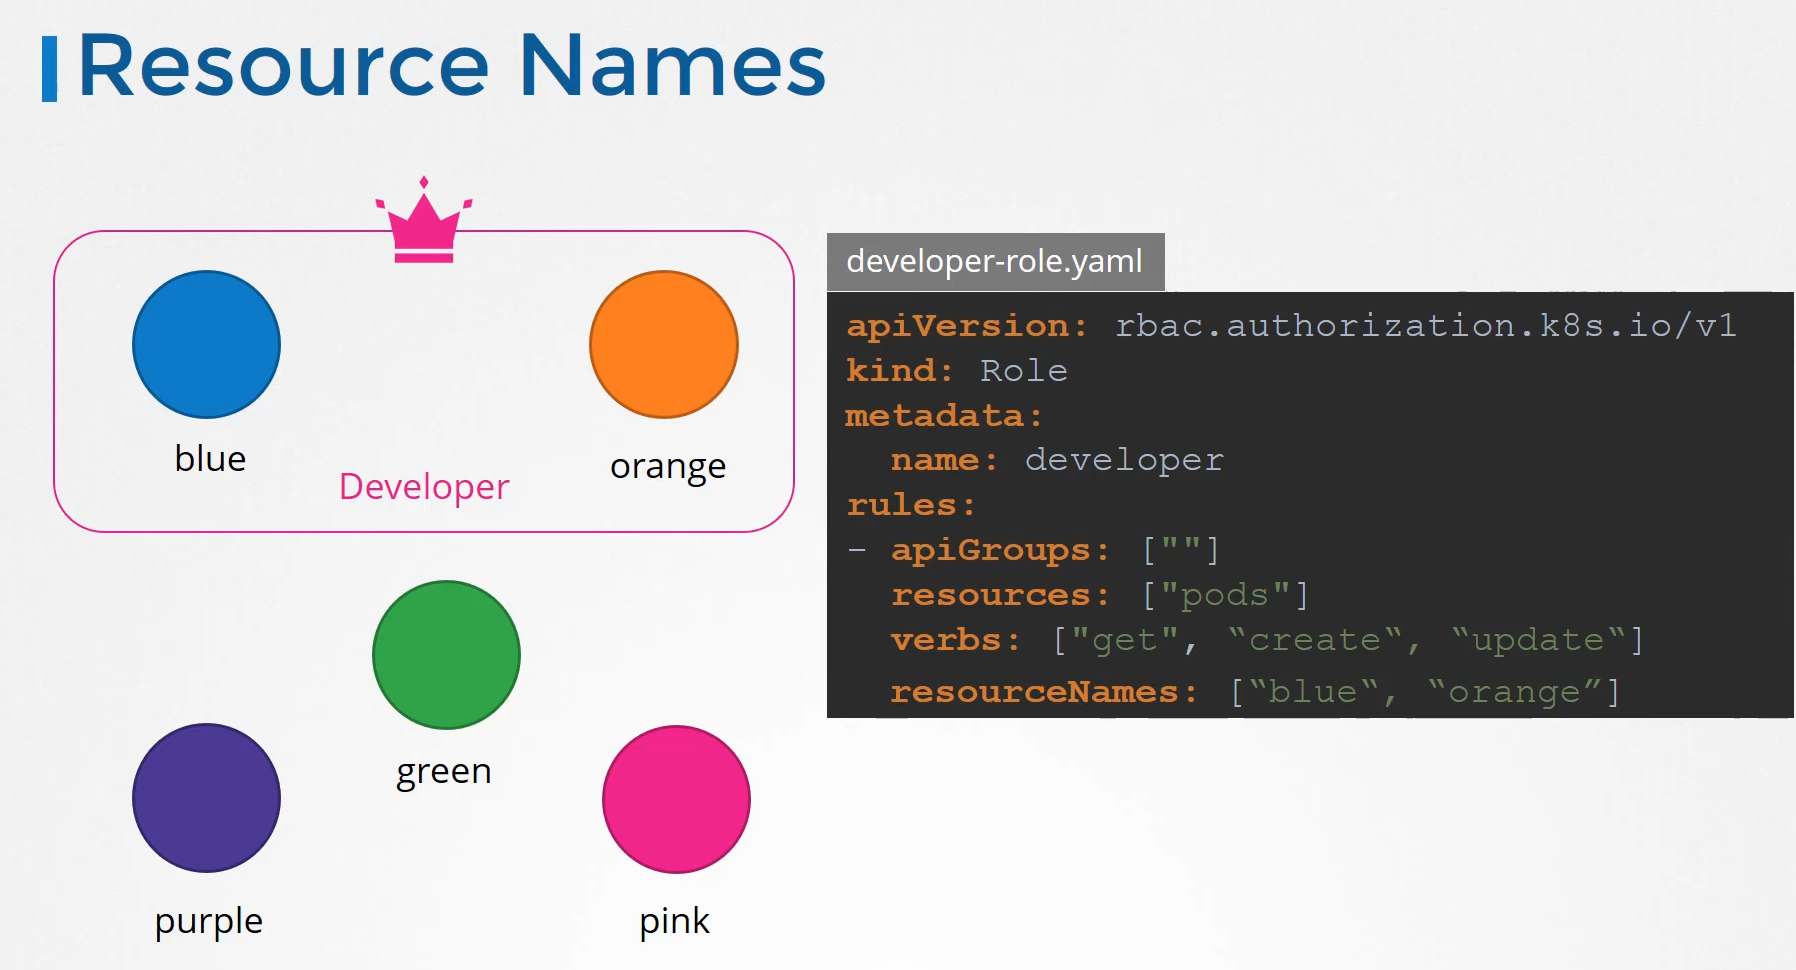
Resource Names
리소스 이름으로 권한 제한을 할 수 있다.
( 여기서 resourceNames 가 네임 스페이스 인가 확인해봐야겠다.)
160. Practice Test - RBAC
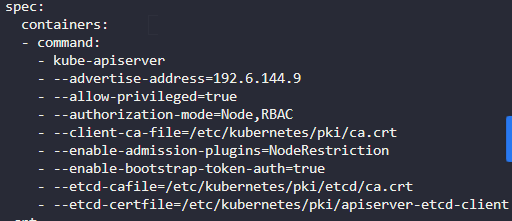
1. Inspect the environment and identify the authorization modes configured on the cluster.
Check thekube-apiserversettings.
kube-apiserver.yaml 위치
cat /etc/kubernetes/manifests/kube-apiserver.yaml
Node, RBAC 이다.
2. How many roles exist in thedefaultnamespace?
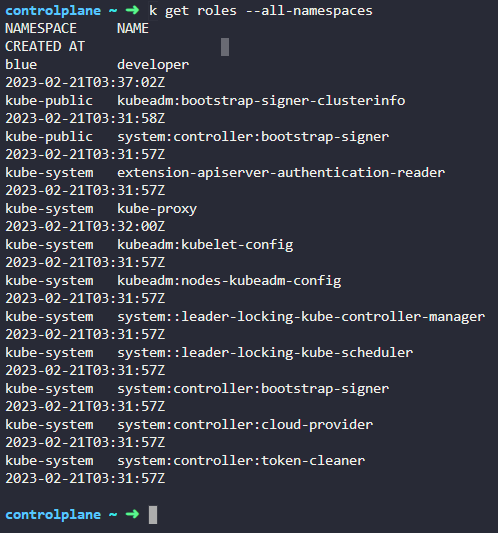
3. How many roles exist in all namespaces together?
12개
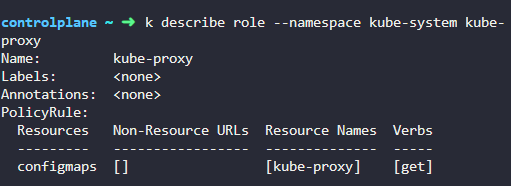
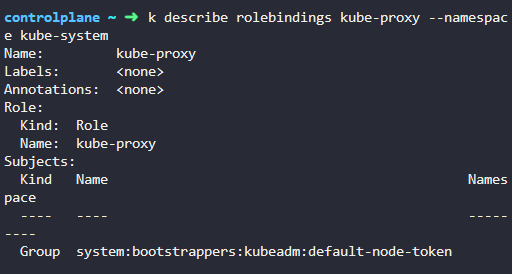
4. What are the resources thekube-proxyrole in thekube-systemnamespace is given access to?
configmaps
5. What actions can thekube-proxyrole perform onconfigmaps?
get
6. Which of the following statements are true?
1. kube-proxy role can get details of all configmap objects in the default namespace 2. kube-proxy role can delete the configmap it created 3. kube-proxy role can get details of configmap object by the name kube-proxy only <- 4. kube-proxy role can get details of all configmap objects in the cluster 5. kube-proxy role can only view and update configmap object by the name kube-proxy
7. Which account is thekube-proxyrole assigned to?
Group 부분
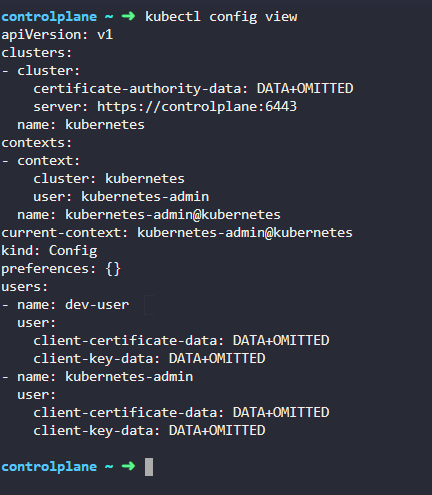
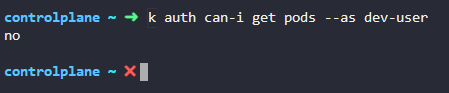
8. A userdev-useris created. User's details have been added to thekubeconfigfile. Inspect the permissions granted to the user. Check if the user can list pods in thedefaultnamespace.
9.
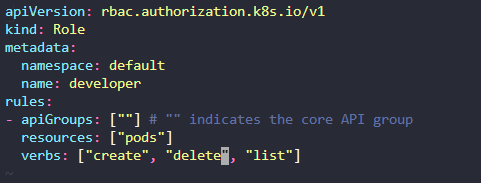
Create the necessary roles and role bindings required for thedev-userto create, list and delete pods in thedefaultnamespace.
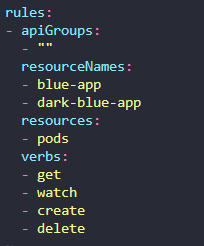
10. A set of new roles and role-bindings are created in thebluenamespace for thedev-user. However, thedev-useris unable to get details of thedark-blue-apppod in thebluenamespace.
Investigate and fix the issue.
We have created the required roles and rolebindings, but something seems to be wrong.
resourceNames 에 dark-blue-app 을 추가해준다.
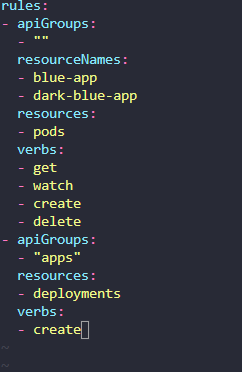
11. Add a new rule in the existing roledeveloperto grant thedev-userpermissions to create deployments in thebluenamespace.
Remember to add api group"apps".
추가가해준다.
162. Cluster Roles and Role bindings
클러스터 롤과 클러스터롤바인딩에 대해 배워보자.
기존에 role은 default 네임스페이스를 가정한다.
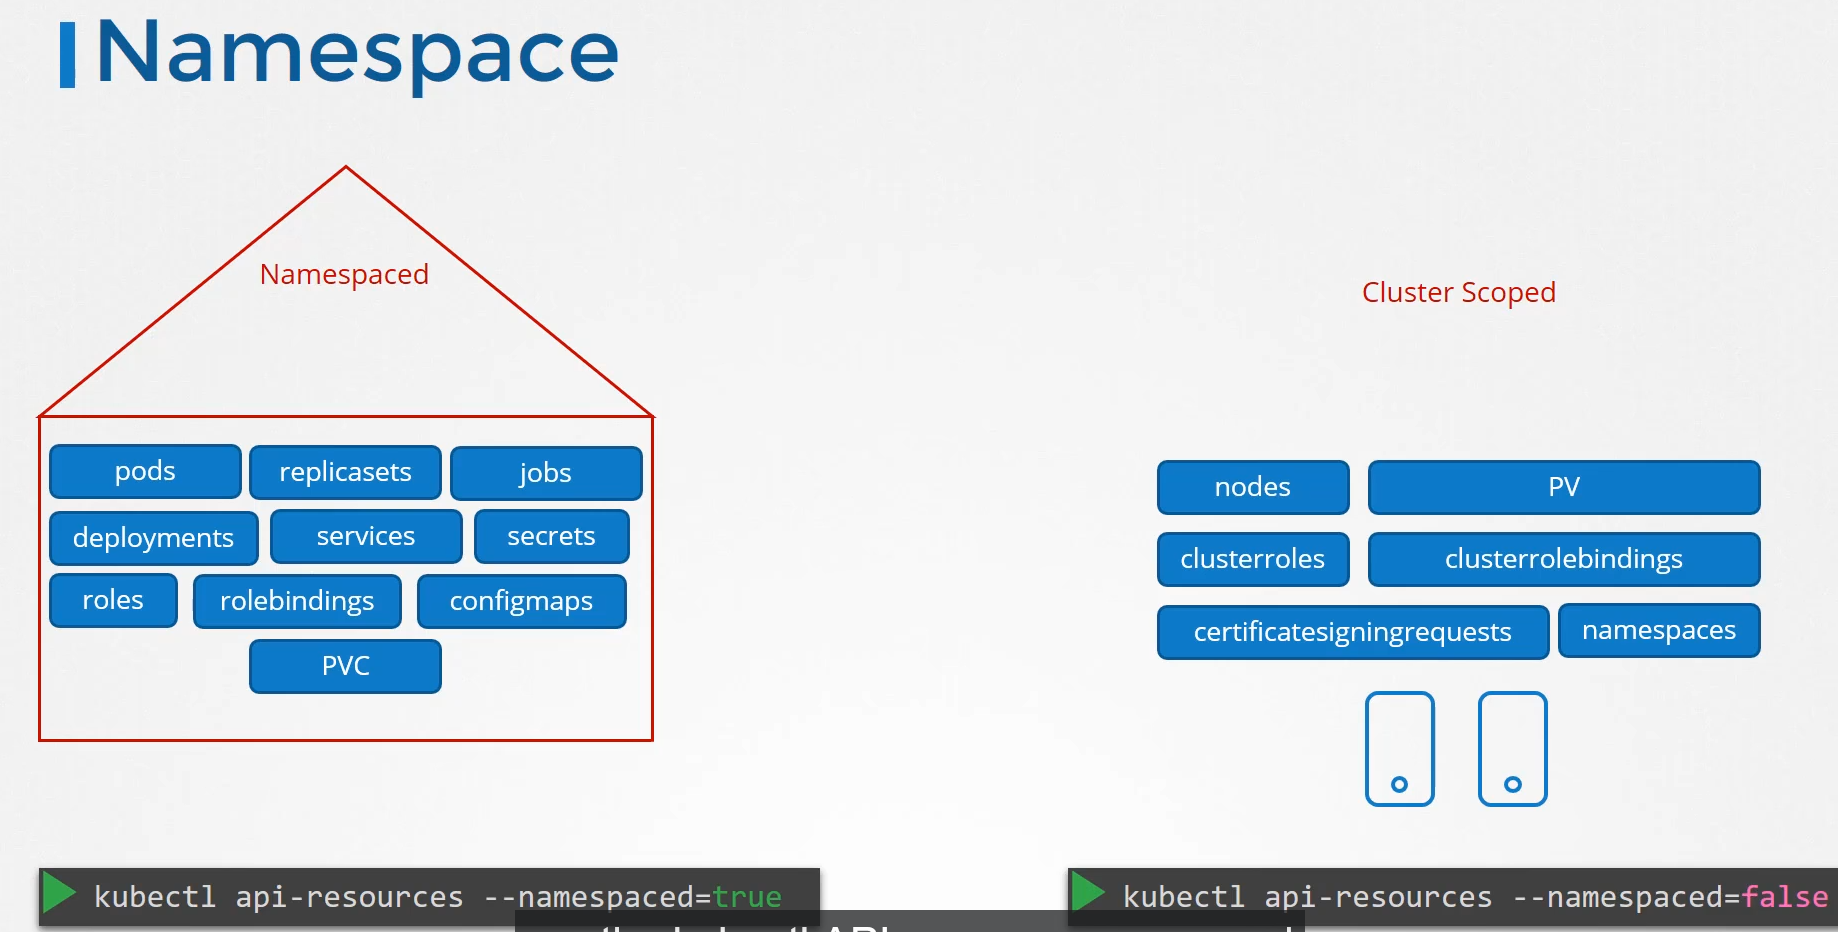
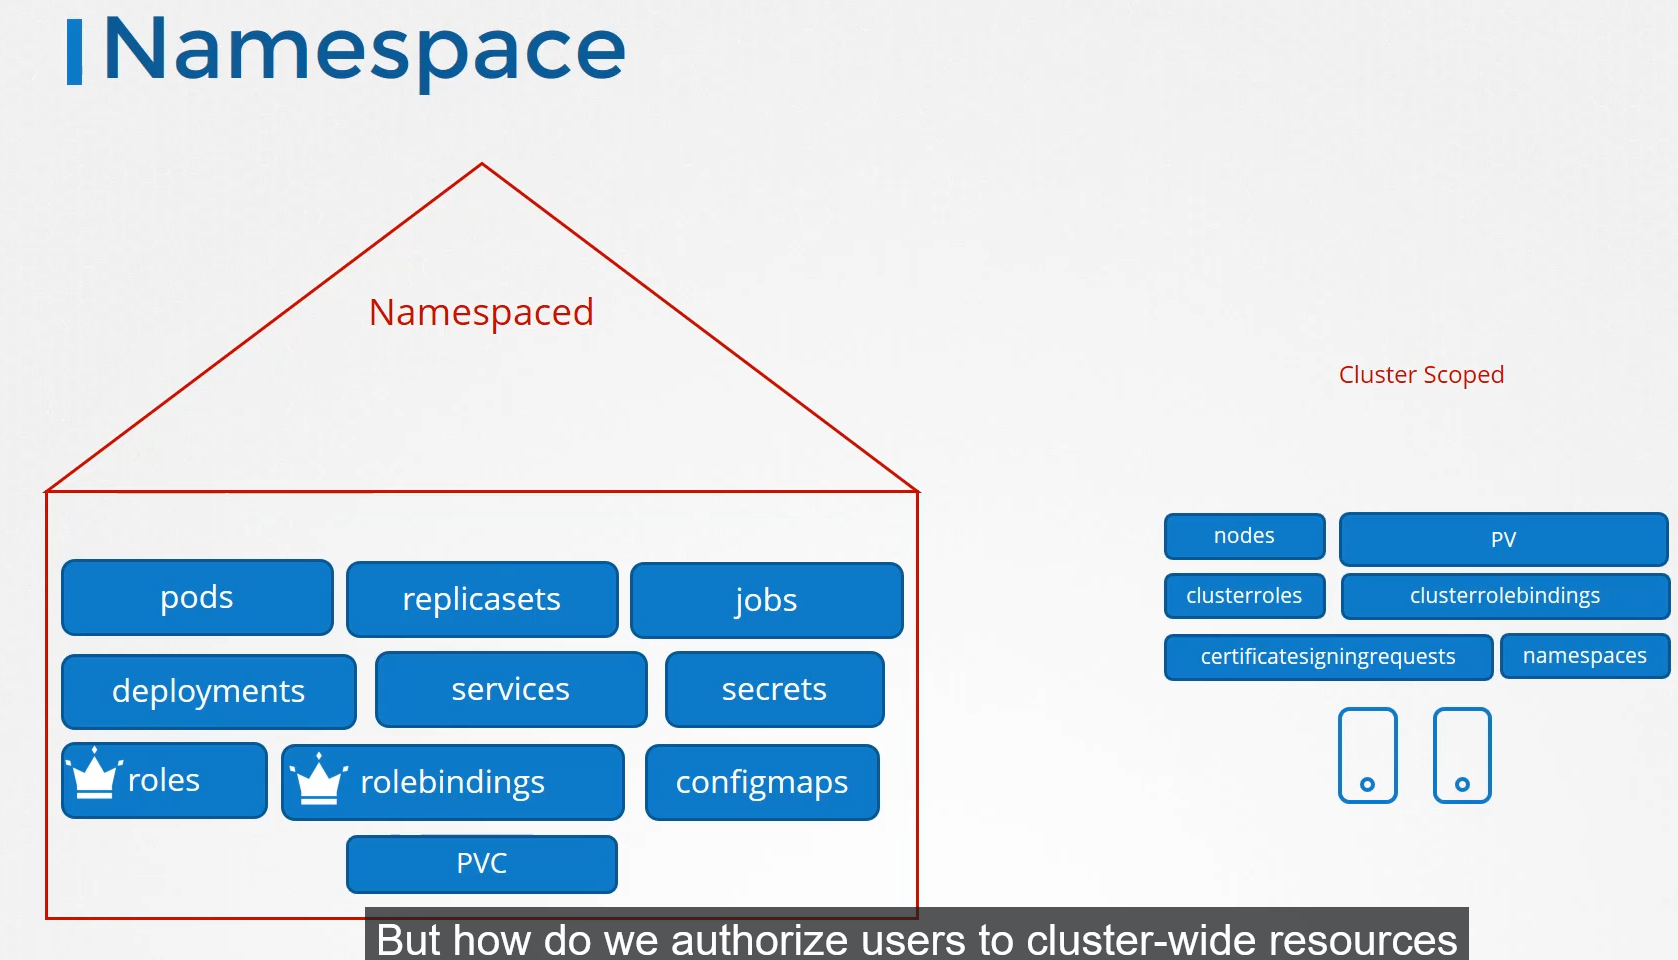
Namespace
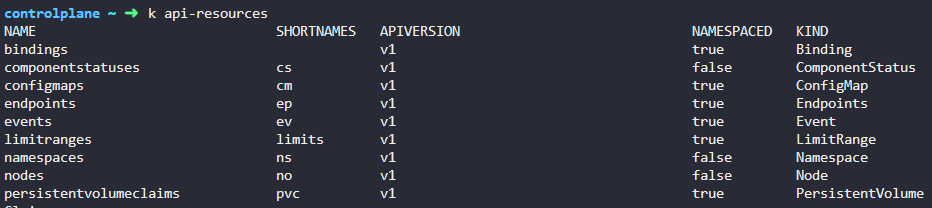
네임스페이스로 걸러지는 리소스가 있고 그 외는 클러스터단의 리소스라고 보면된다.
확인하고 싶으면 namespaced 옵션을 이용하면 된다.
지난 시간에 만든 role 과 rolebinding은 네임스페이스에 영향을 받는 구간이다.
만야 클러스터 단에서 클러스터롤과 바인딩 하고 싶다면?
마찬가지로 클러스터 롤과 바인딩이 있다.
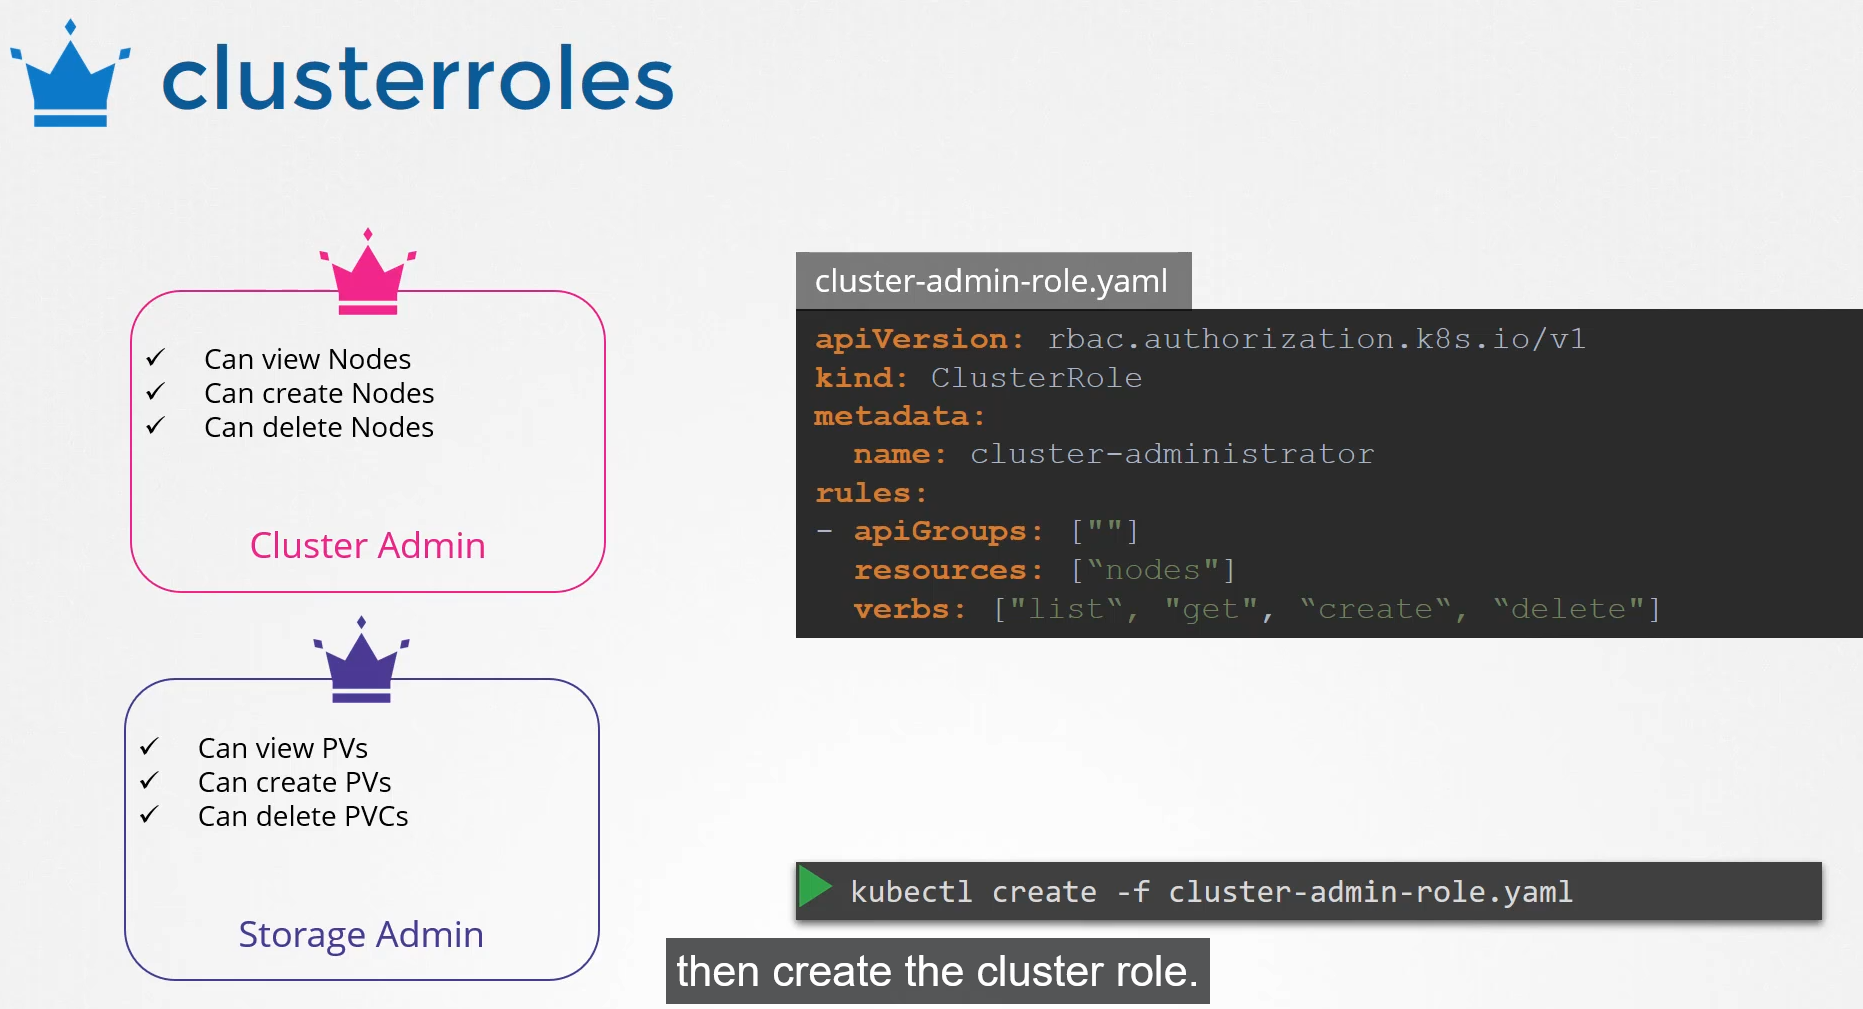
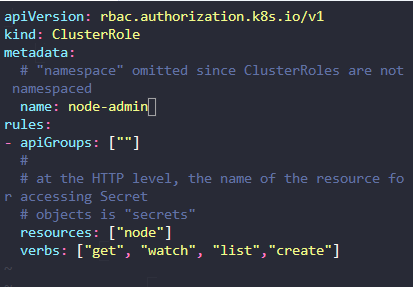
Clusterroles
예시
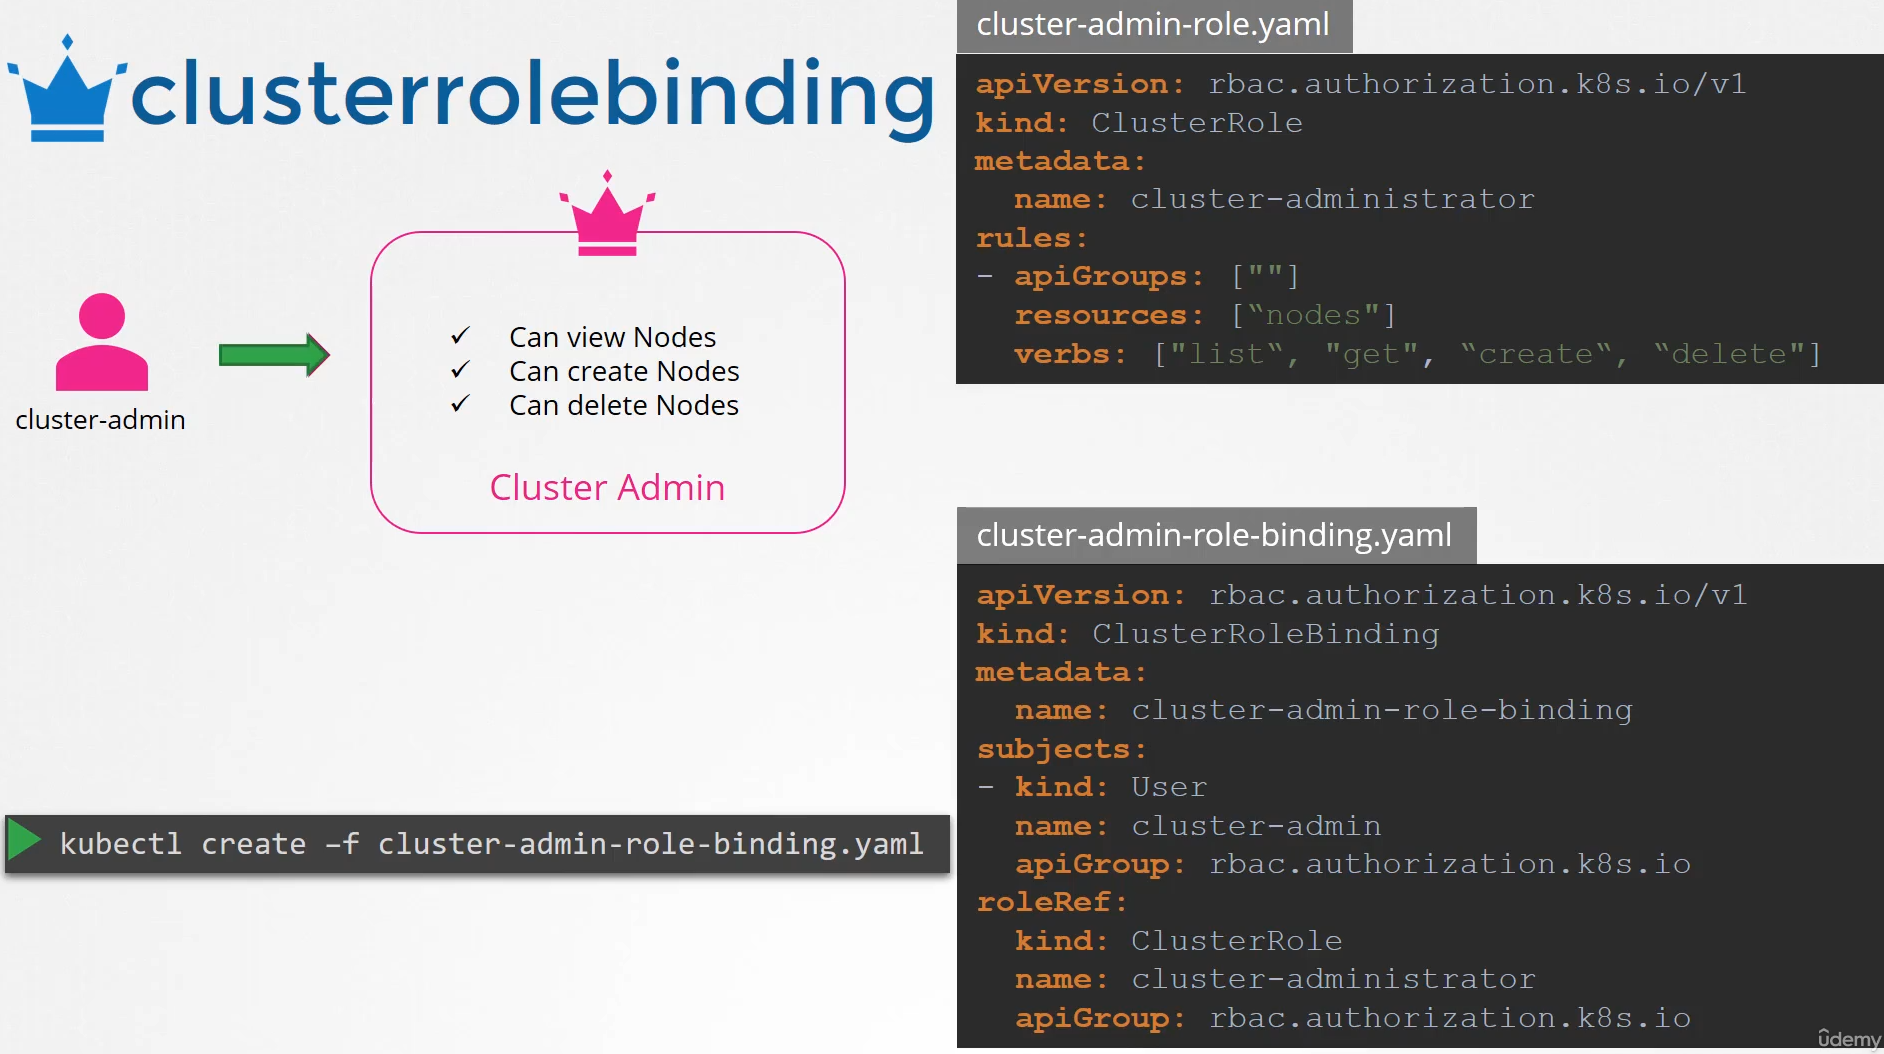
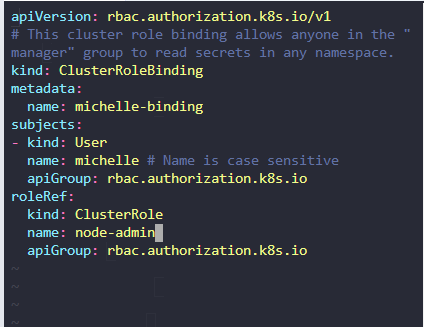
clusterrolebinding
비슷하다!
클러스터롤 로 파드에 접속하게 허락하면 클러스터내의 모든 파드에 접근할 수 있다.
163. Practice Test - Cluster Roles and Role Bindings
1. For the first few questions of this lab, you would have to inspect the existingClusterRolesandClusterRoleBindingsthat have been created in this cluster.
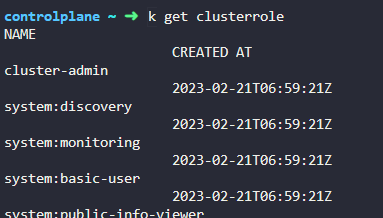
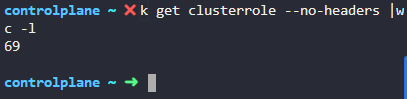
2. How manyClusterRolesdo you see defined in the cluster?
너무 많을때는??
--no-headers | wc -l 옵션으로 갯수를 찾을 수 있다.
3. How manyClusterRoleBindingsexist on the cluster?
4. What namespace is thecluster-adminclusterrole part of?
1. Cluster Roles are cluster wide and not part of any namespace <- 2. kube-system 3. kube-public 4. default
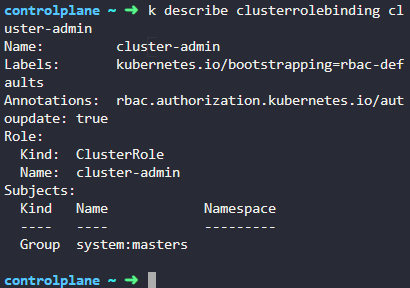
5. What user/groups are thecluster-adminrole bound to?
The ClusterRoleBinding for the role is with the same name.
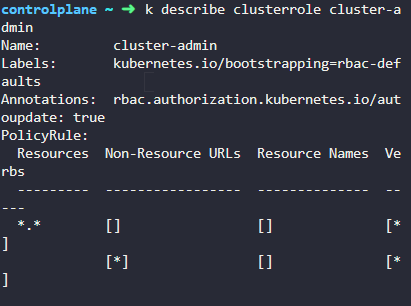
6. What level of permission does thecluster-adminrole grant?
Inspect thecluster-adminrole's privileges.
1. Perform any action on any resource in the cluster<- 2. Pod level tasks only 3. Security related tasks only 4. Node level tasks only
7. A new usermichellejoined the team. She will be focusing on thenodesin the cluster. Create the requiredClusterRolesandClusterRoleBindingsso she gets access to thenodes.
node가 아니라 nodes 가 되어야한다.
8. michelle's responsibilities are growing and now she will be responsible for storage as well. Create the requiredClusterRolesandClusterRoleBindingsto allow her access to Storage.
Get the API groups and resource names from commandkubectl api-resources. Use the given spec:
clusterrole 생성
clusterrolebinding 생성
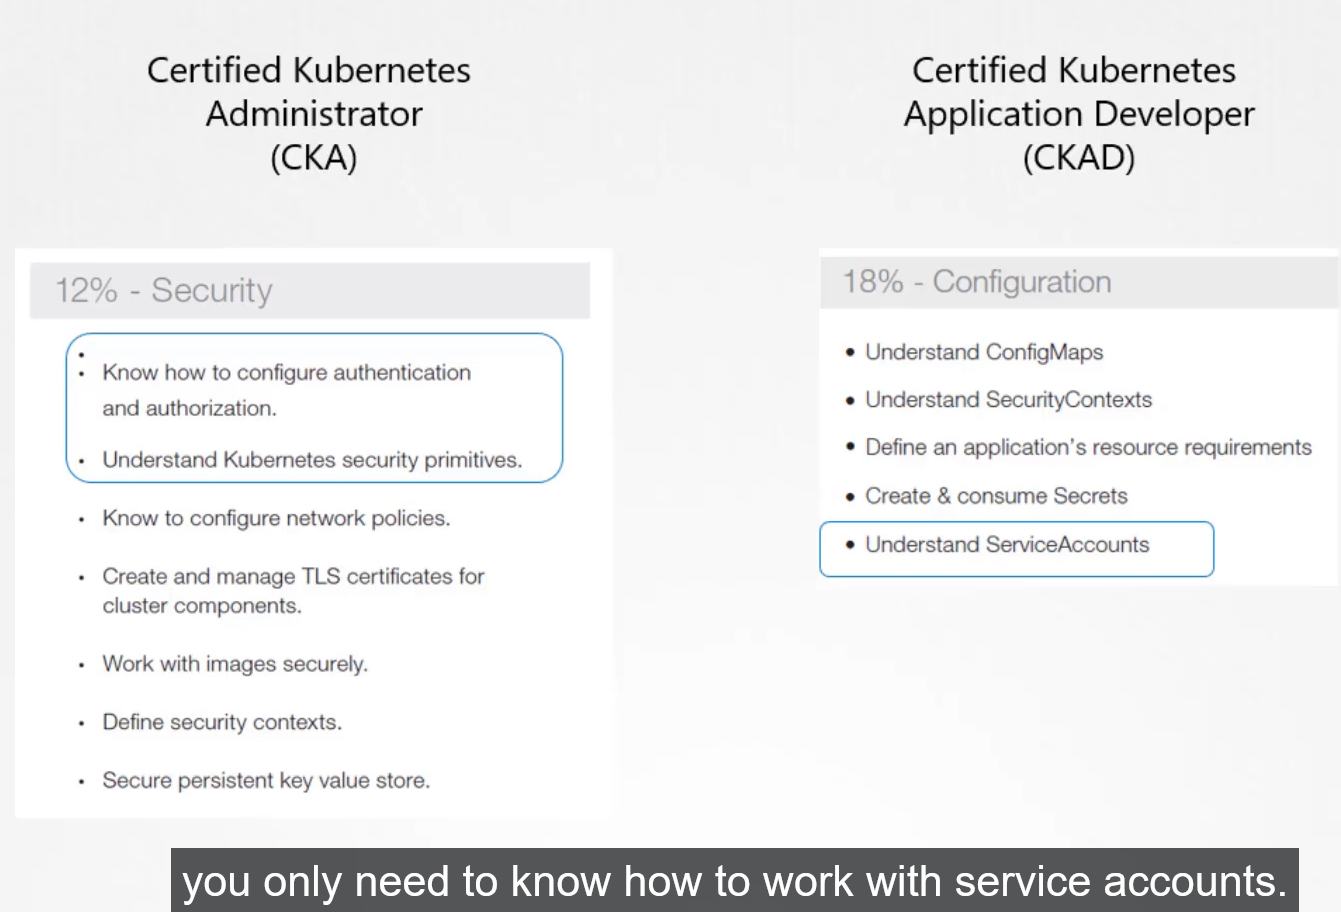
165. Service Accounts
서비스 어카운트의 개념을 알아보자!
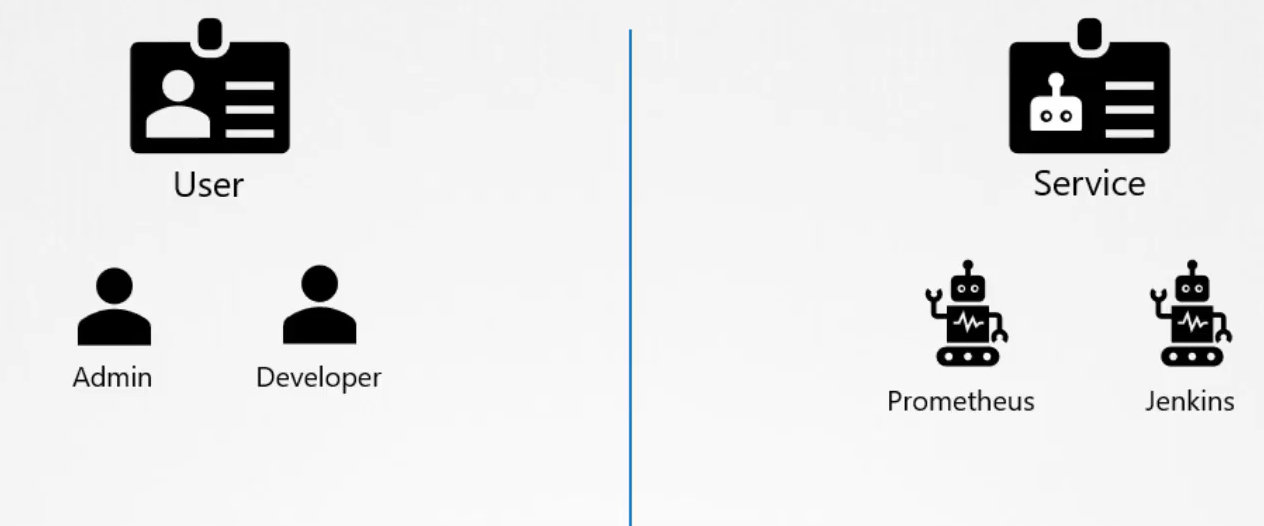
account 종류
user 사람
service none 사람
프로메테우스나 젠킨스 같은거
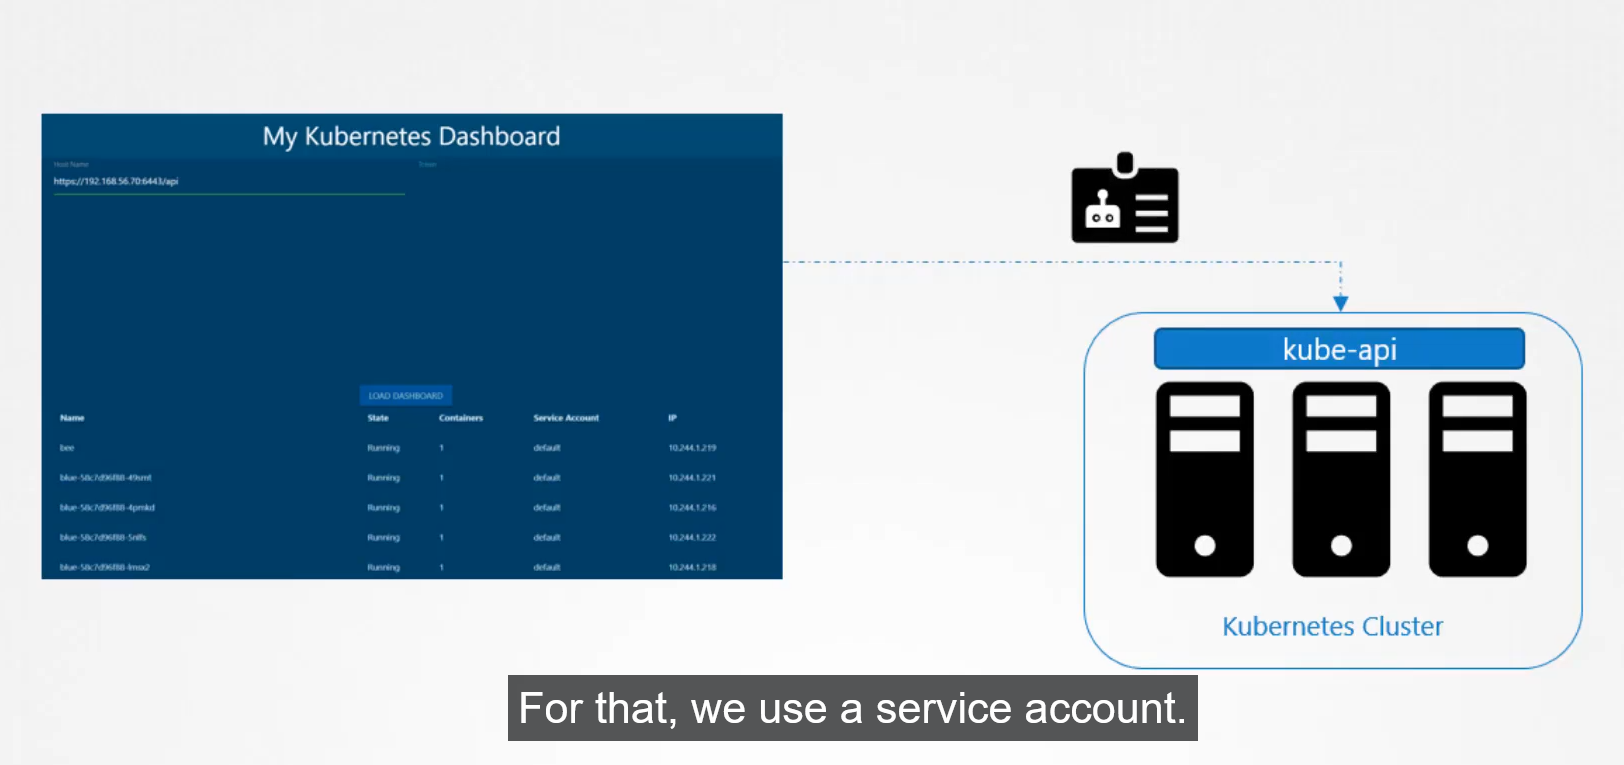
dash board 애플리케이션을 만든다면 kube-api에 수시로 요청을 날려야한다.
당연히 인증이 필요하다.
이럴 때 서비스 계정을 써야한다.
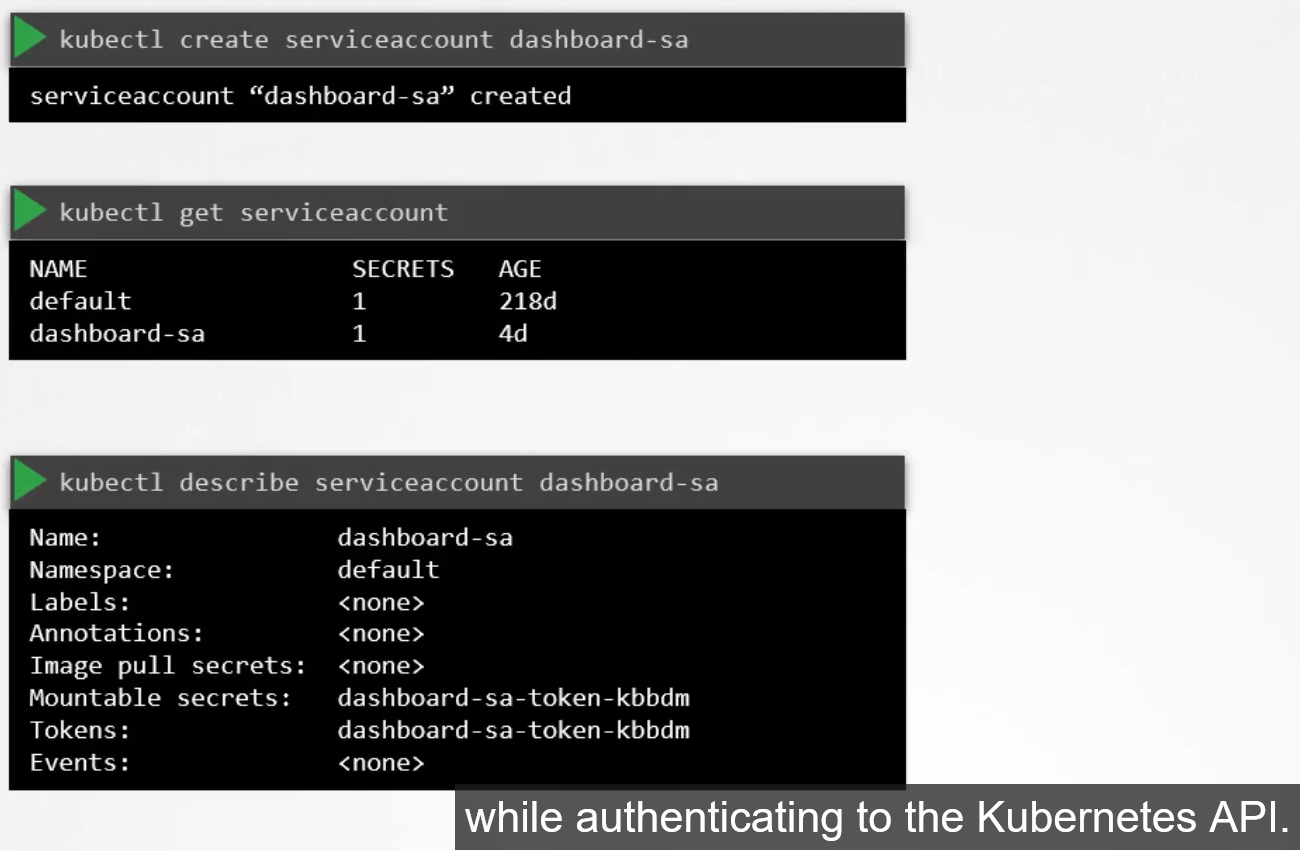
ServiceAccount 관련 명령
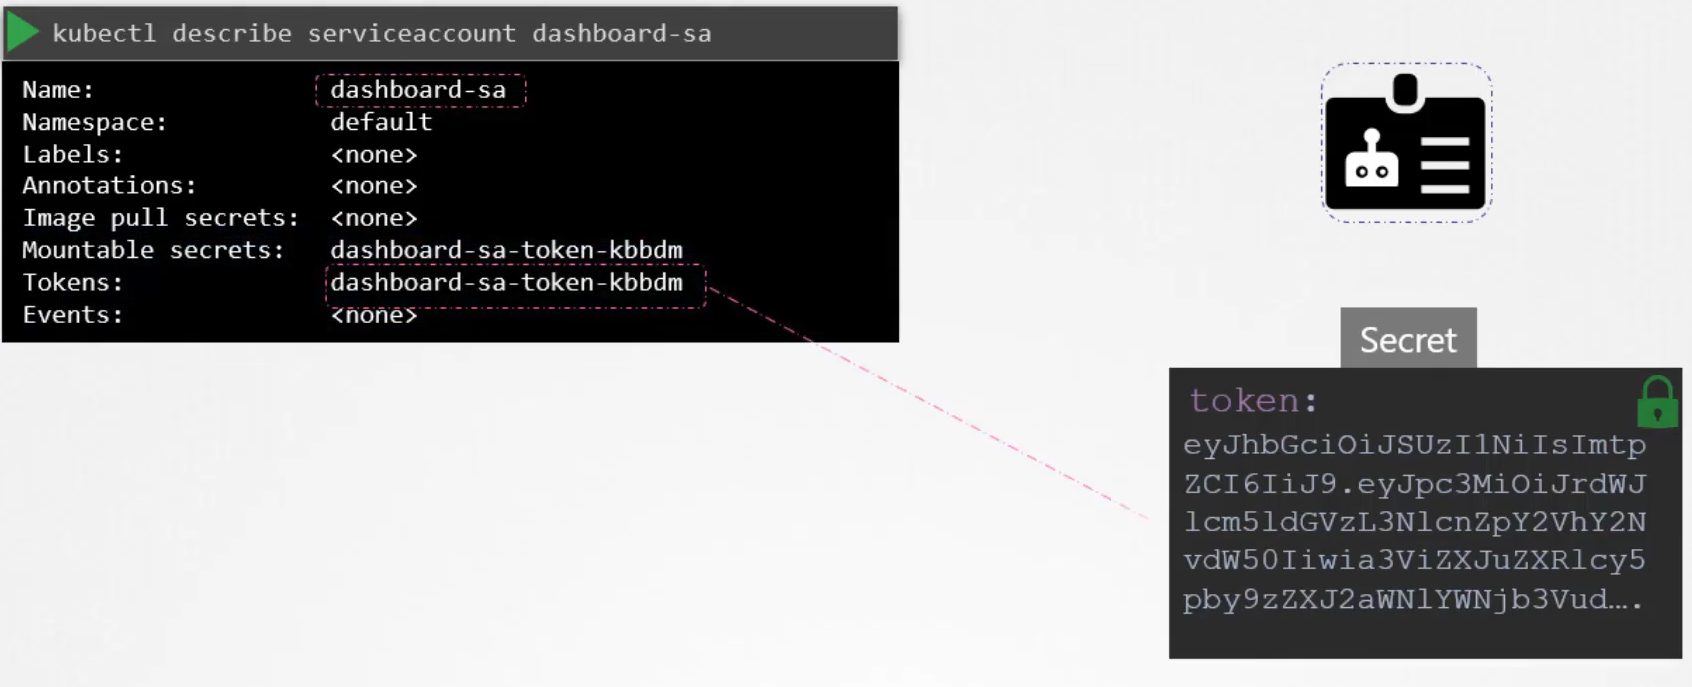
서비스 계정을 생성하면 토큰이 생성된다.
토큰의 내용은 암호화되고 해당 토큰으로 kubeapi 에 인증한다.
시크릿 객체이다.
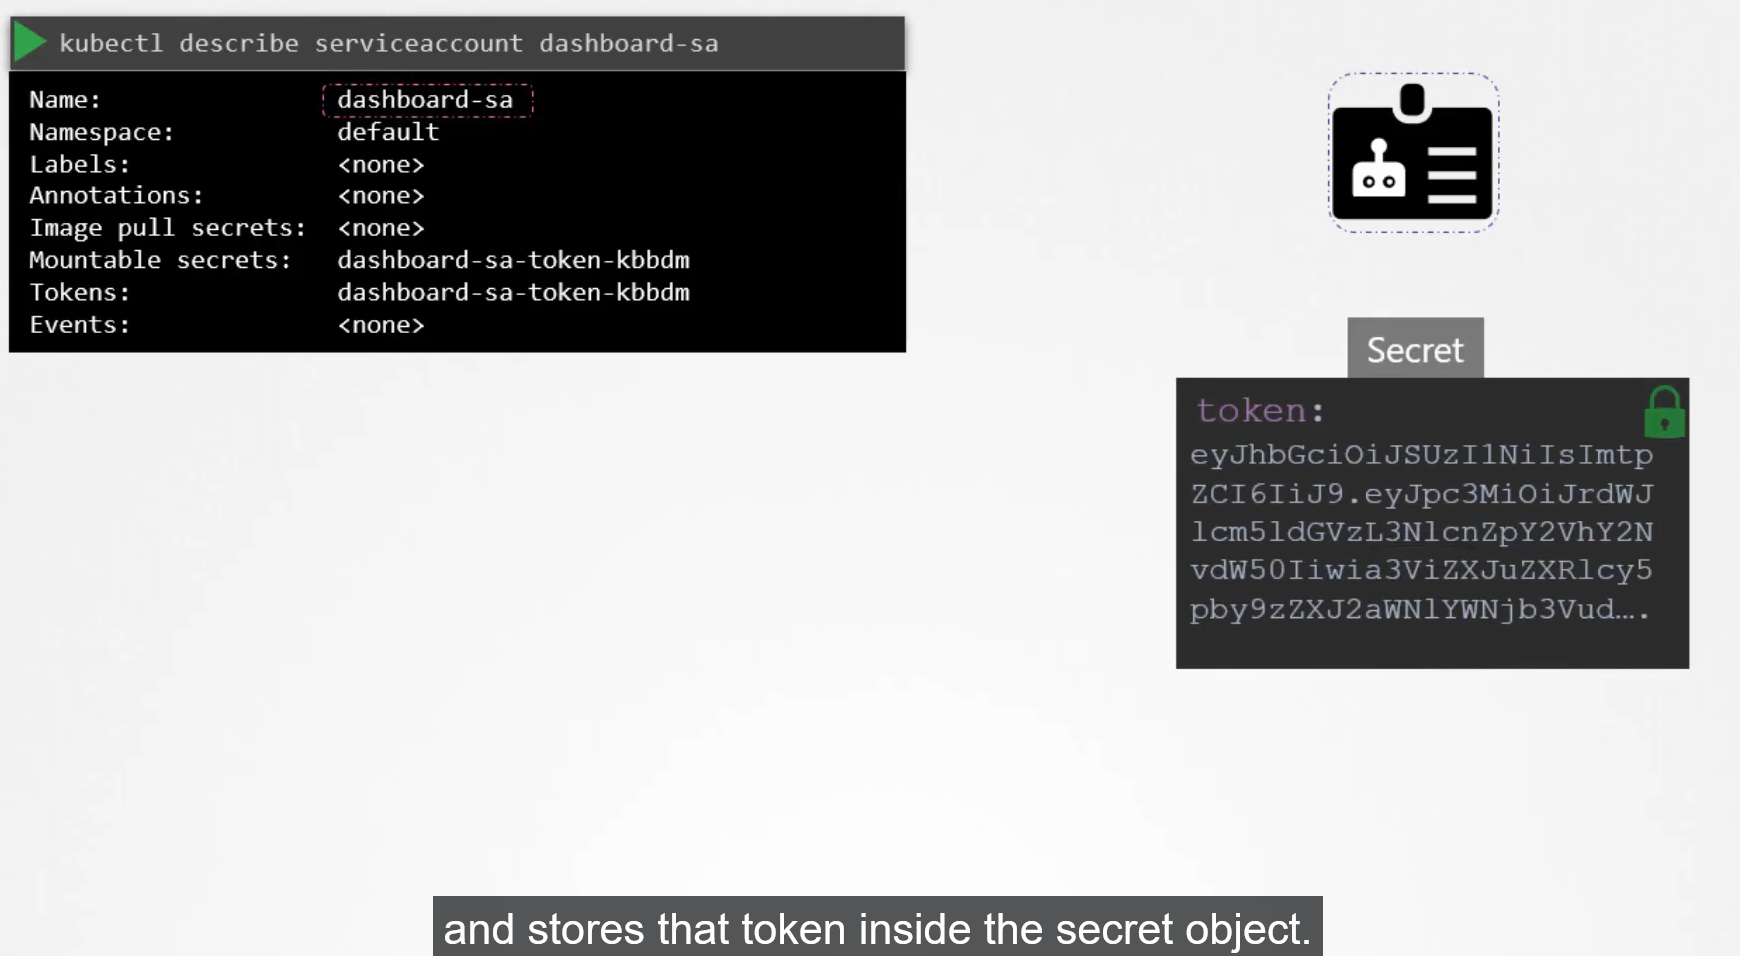
서비스 객체를 생성하면 토큰을 생성하고 해당 토큰을 시크릿 객체에 넣는다.
그 후 시크릿 객체와 서비스 객체랑 연결된다.
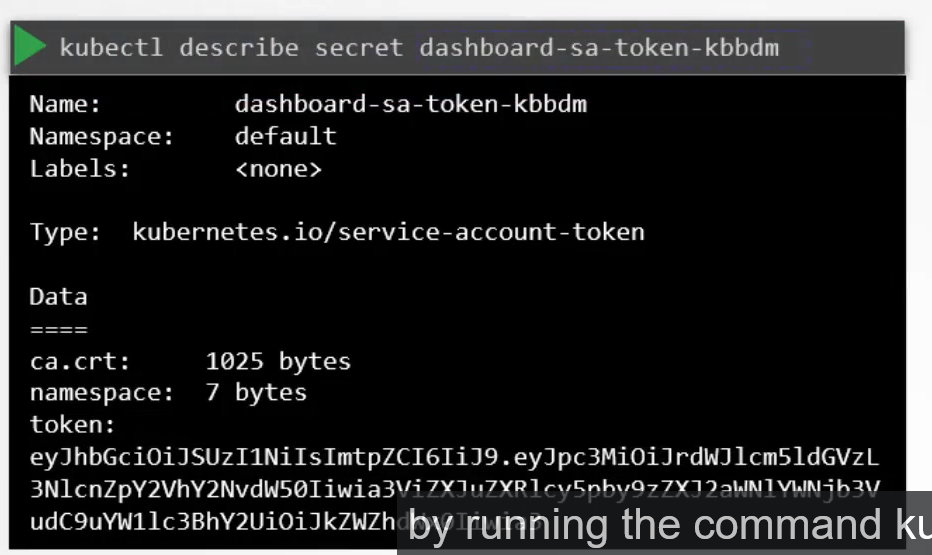
따로 시크릿 객체만 확인하는 것도 가능하다.
curl 에 토큰 데이터를 넣어서 api에 접속할 수도 있다.
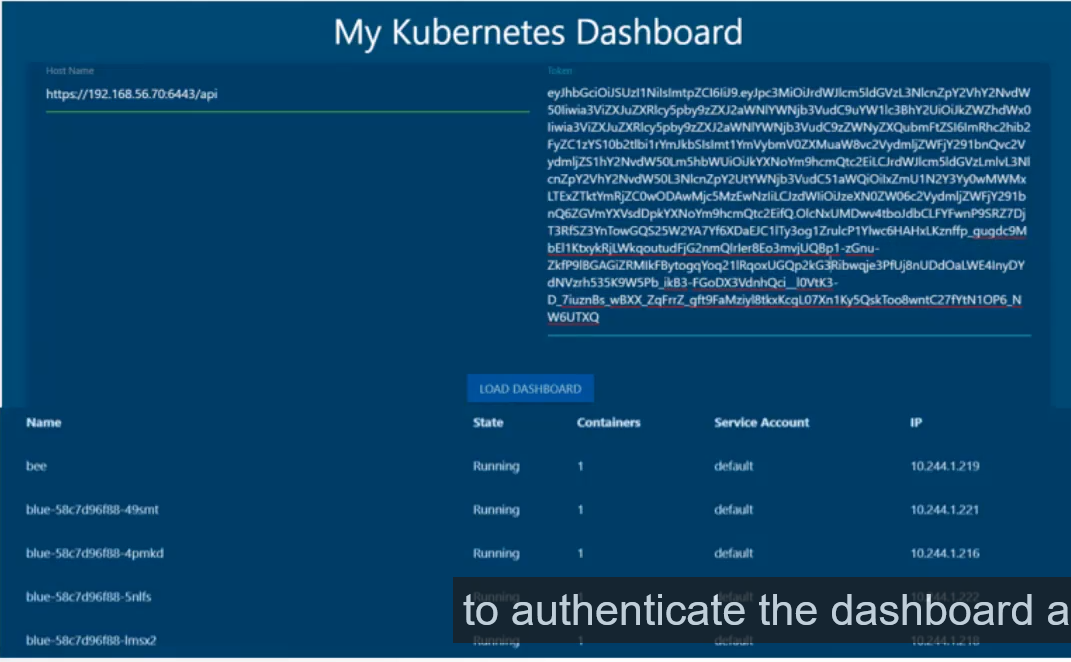
대시보드 앱에서 토큰 내용을 사용해서 인증하는 것도 있다.
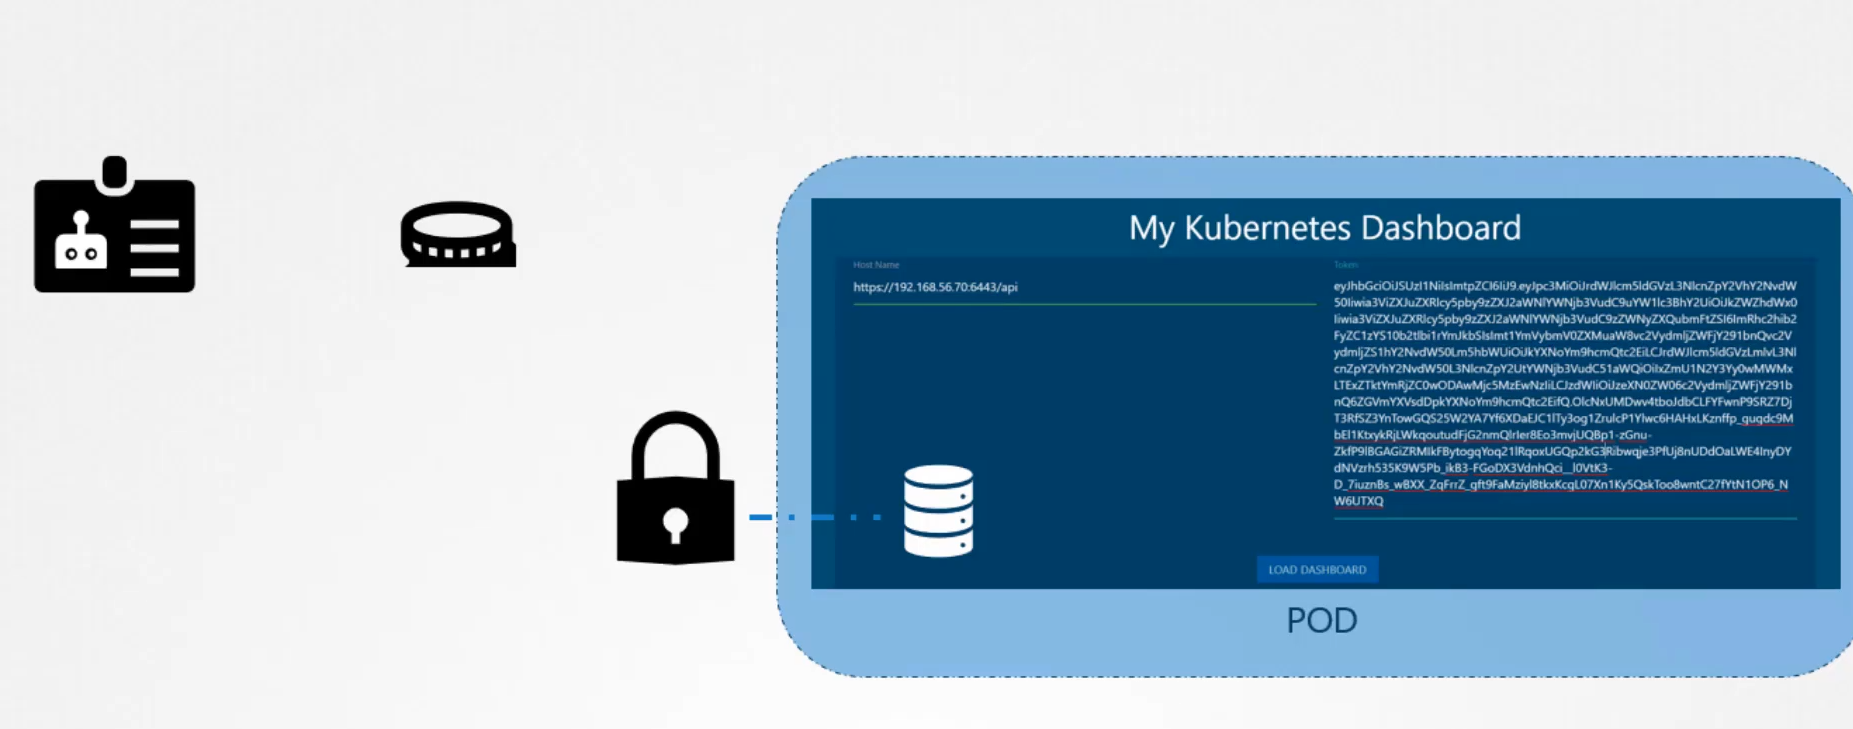
토큰 마운팅
토큰을 마운팅 하면 앱에서 쉽게 kubeapi 에 접속 가능하다.
default sa 는 기본으로 생성됨.
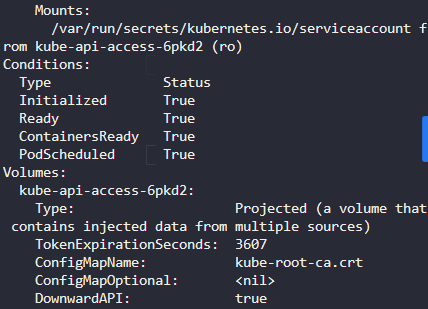
자세히 보면 volumes 에 default 토큰이 마운트 된다.
마운트 된 디렉터리를 확인하면 3가지 파일이 있다.
토큰 실행시 암호가 뜬다.
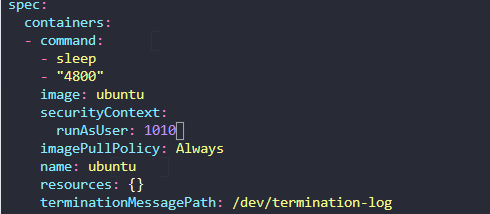
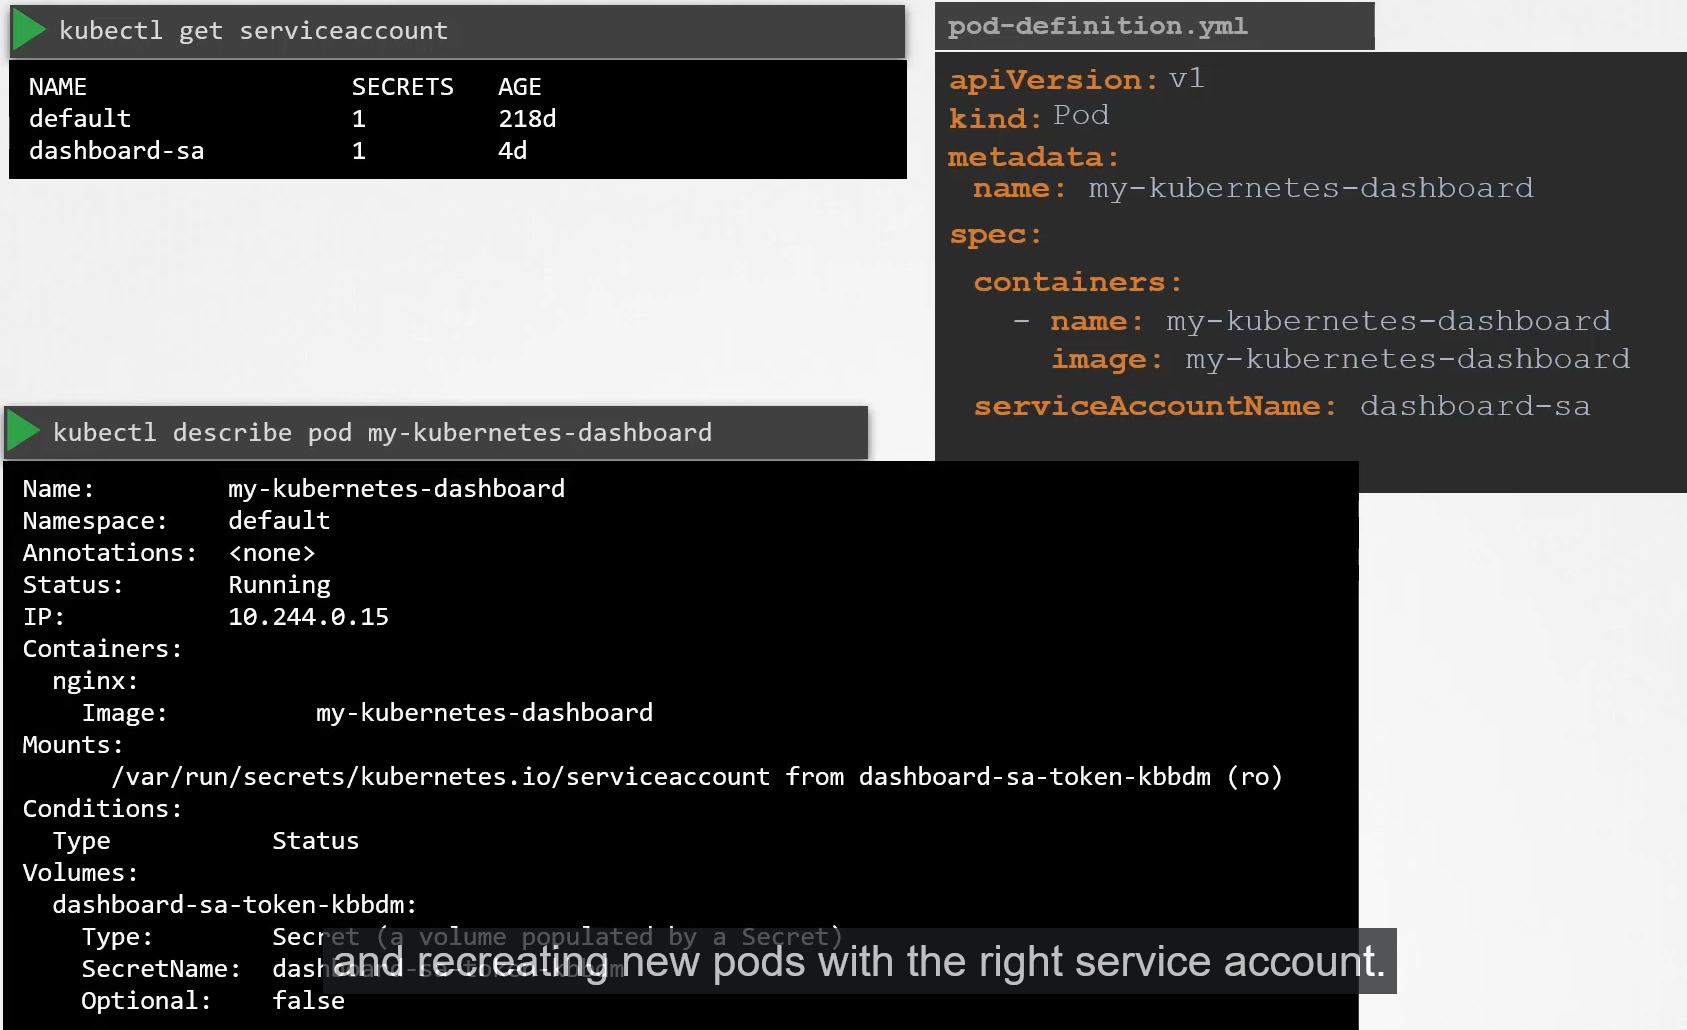
sa 지정해서 사용하기
파드 종료했다가 다시 켜야한다.
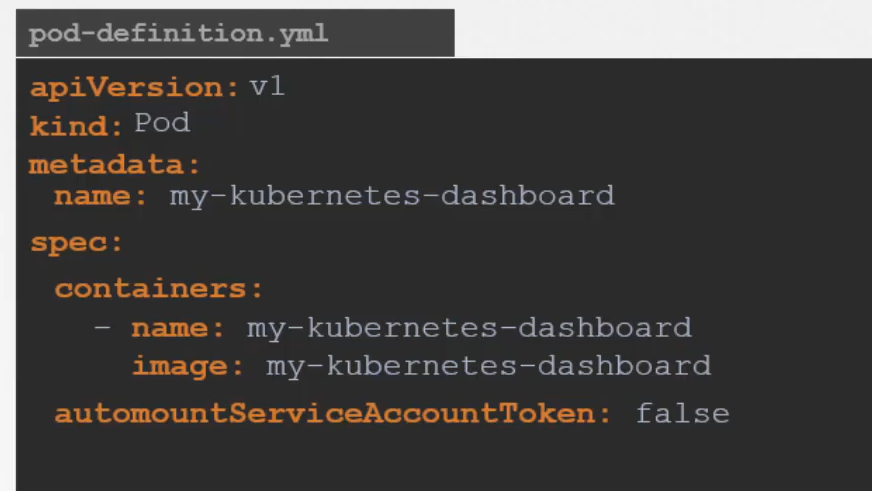
default token 안쓰게 하려면
1.22/1.24 업데이트 사항
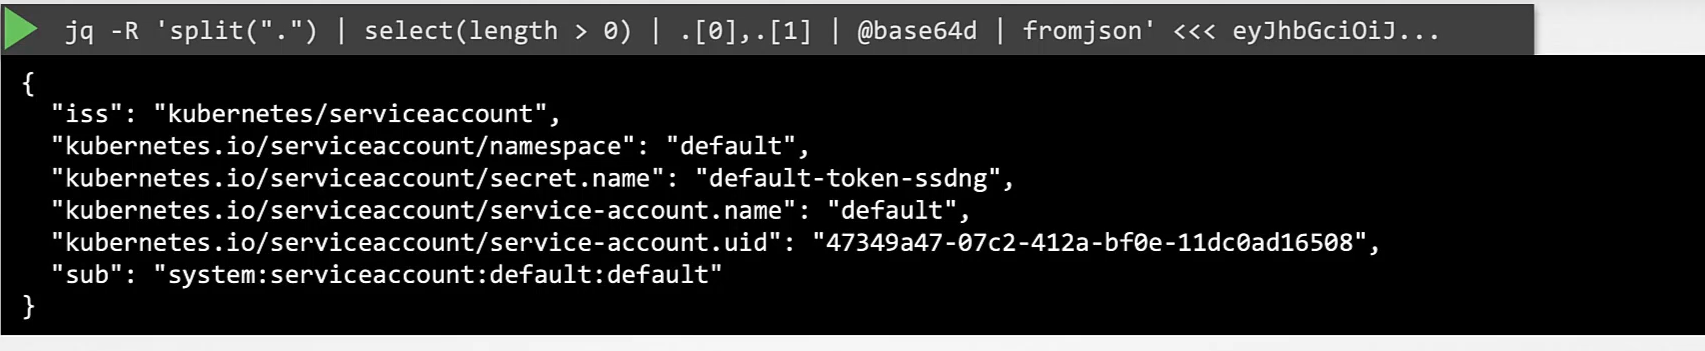
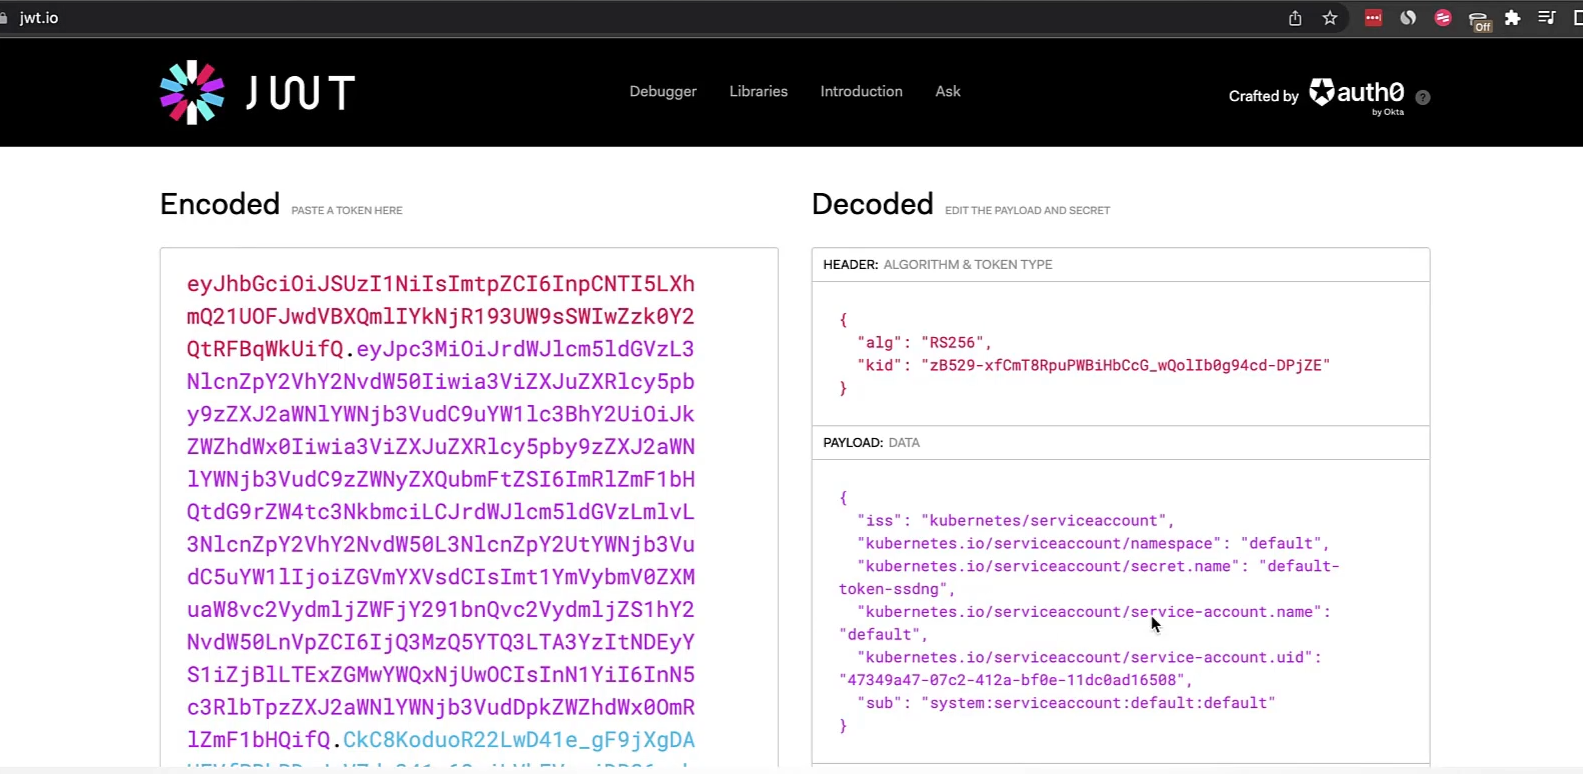
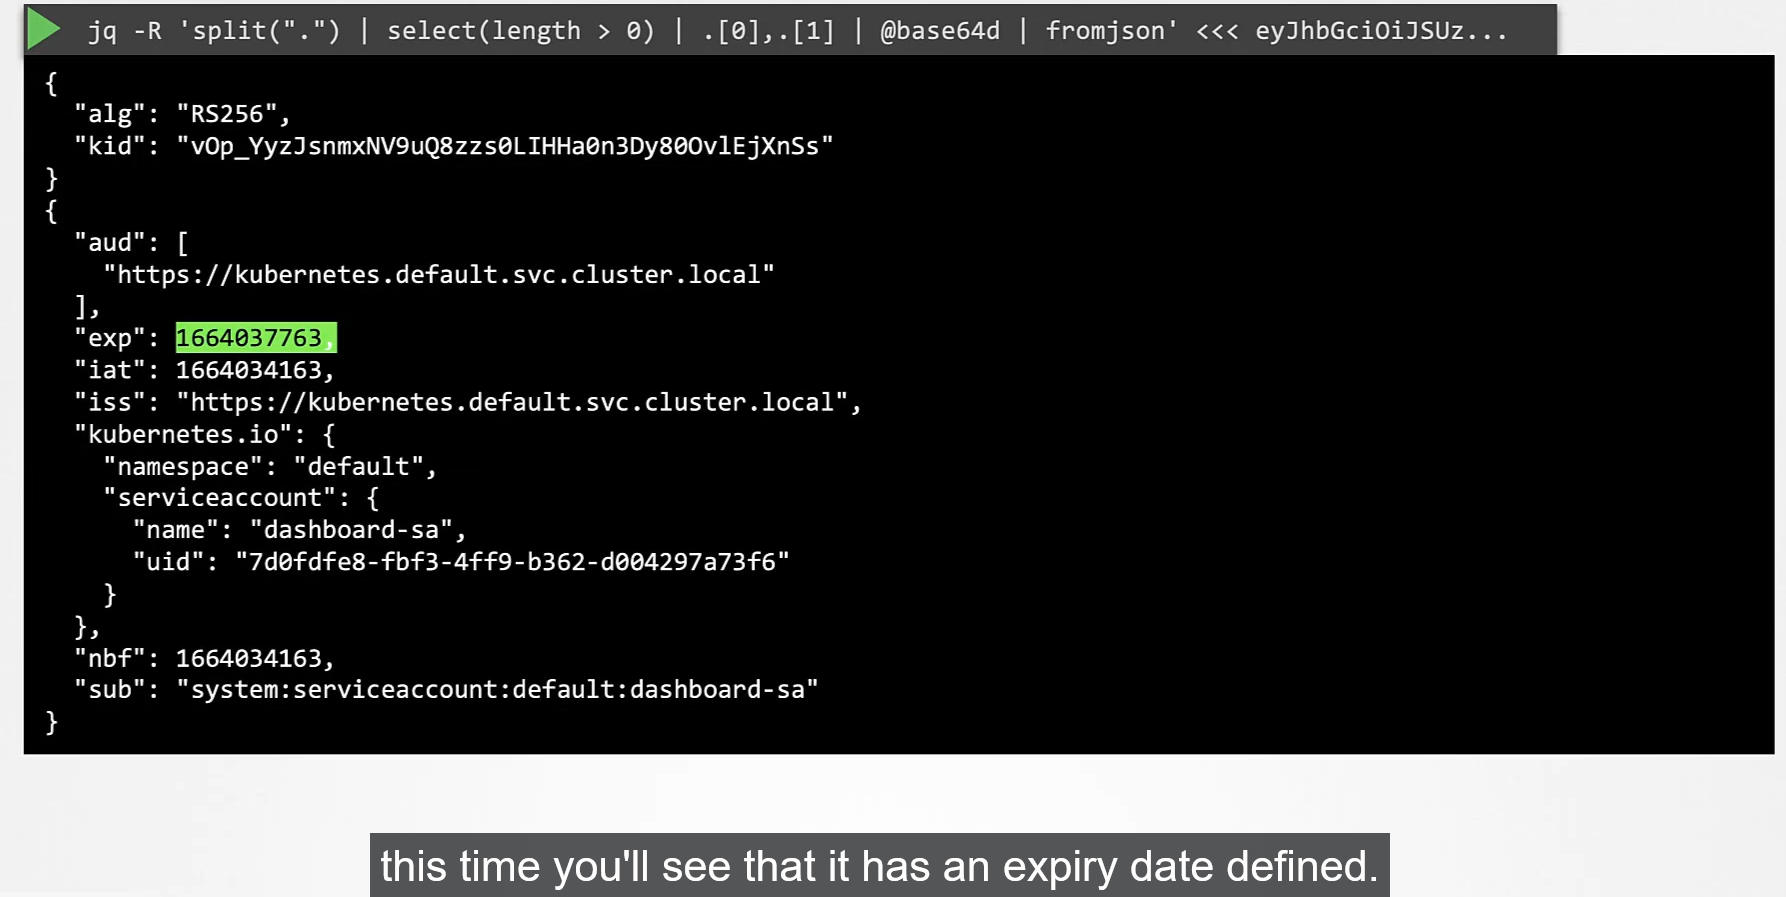
토큰을 복호화 했을때 자세히 보면 만기 기간이 없다.
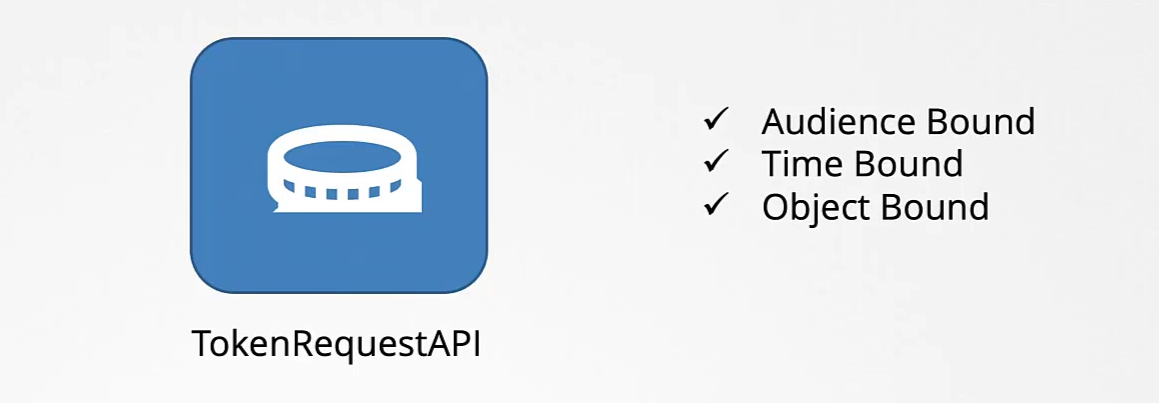
TokenRequestAPI v1.22
토큰 관리를 위한 api 가 추가되었다.
여러가지 조건을 사용할 수 있다.
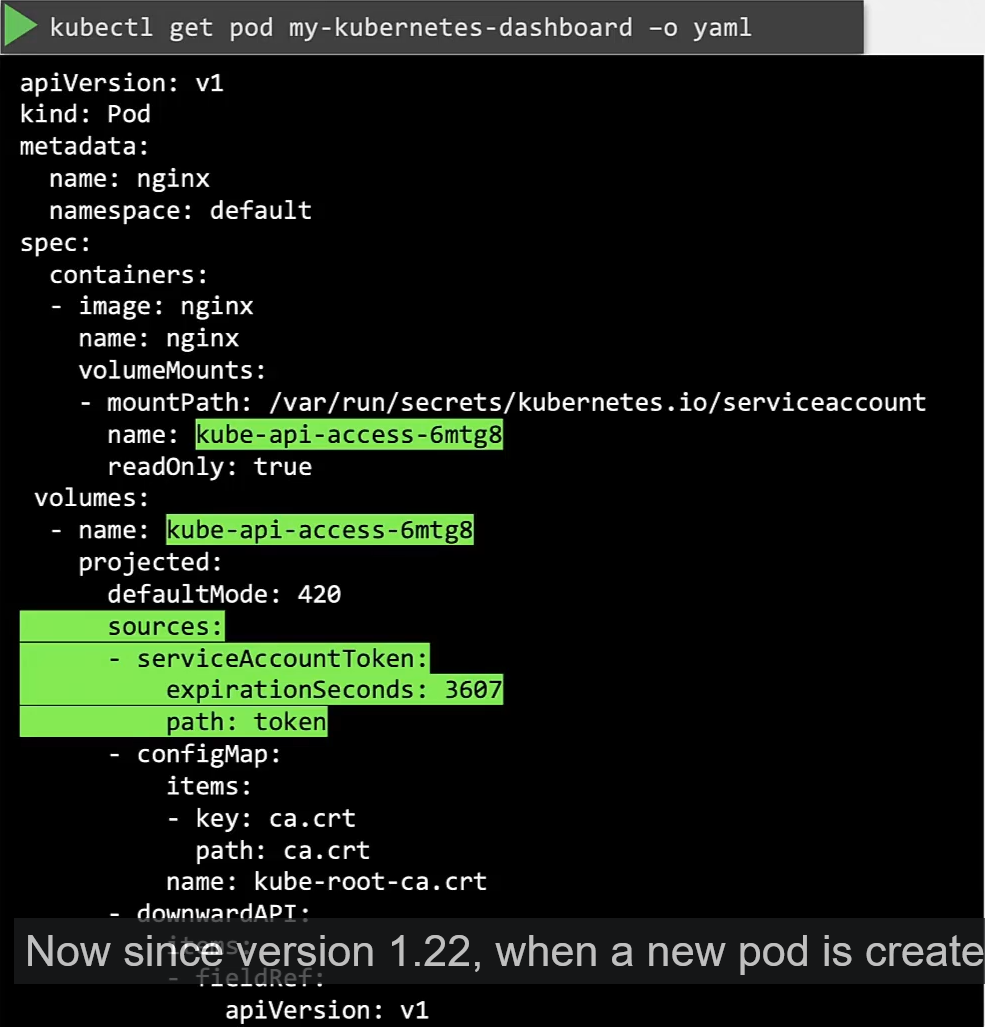
pod를 생성하면 주기를 갖는 토큰이 마운트 된다.
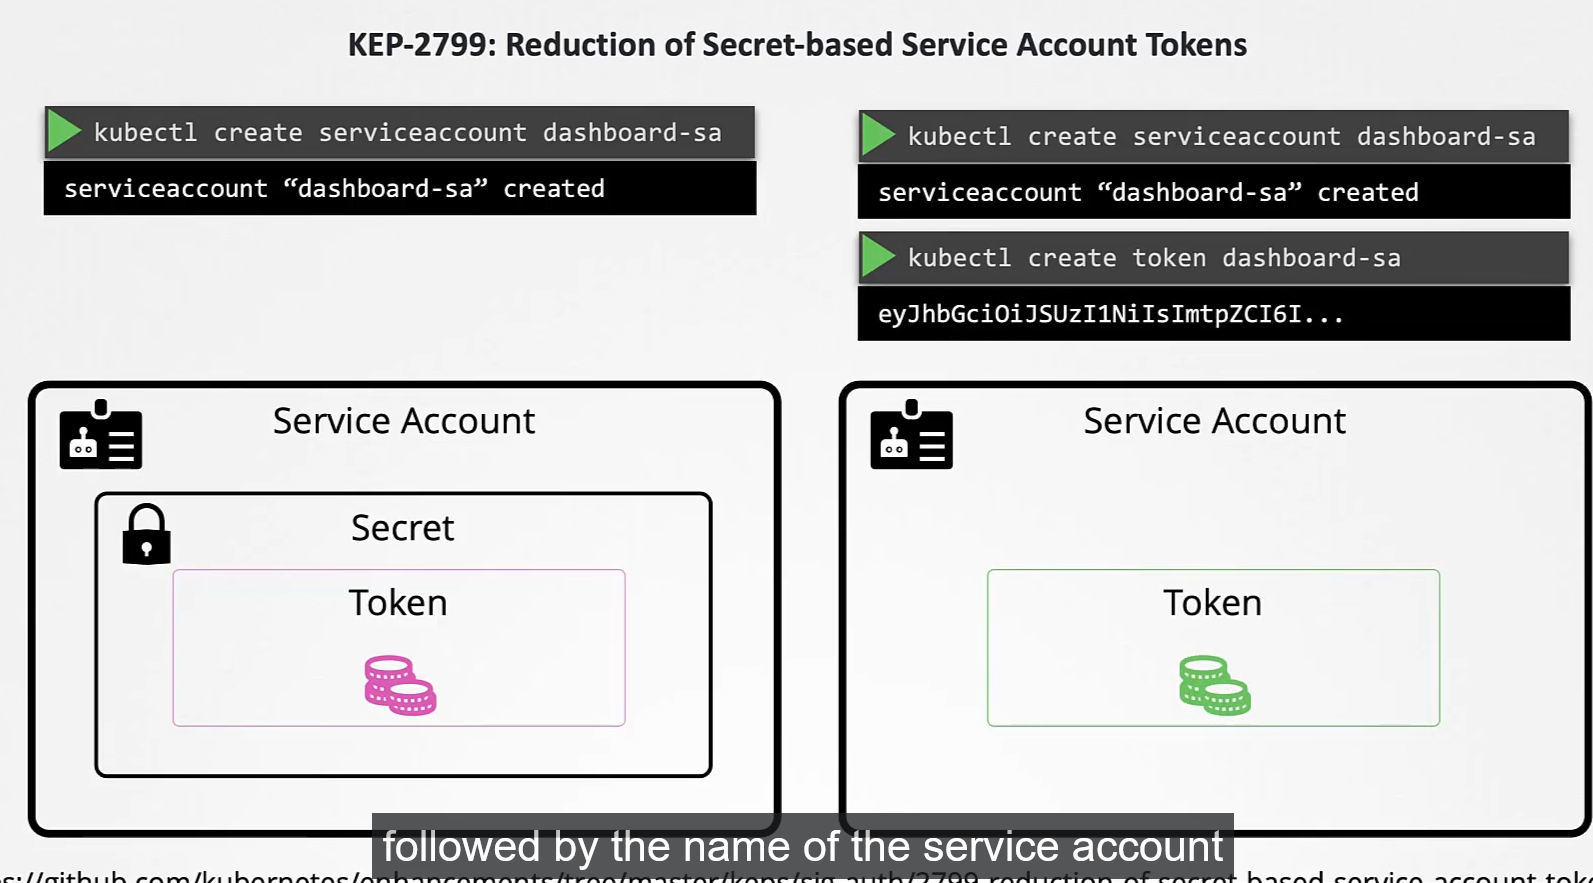
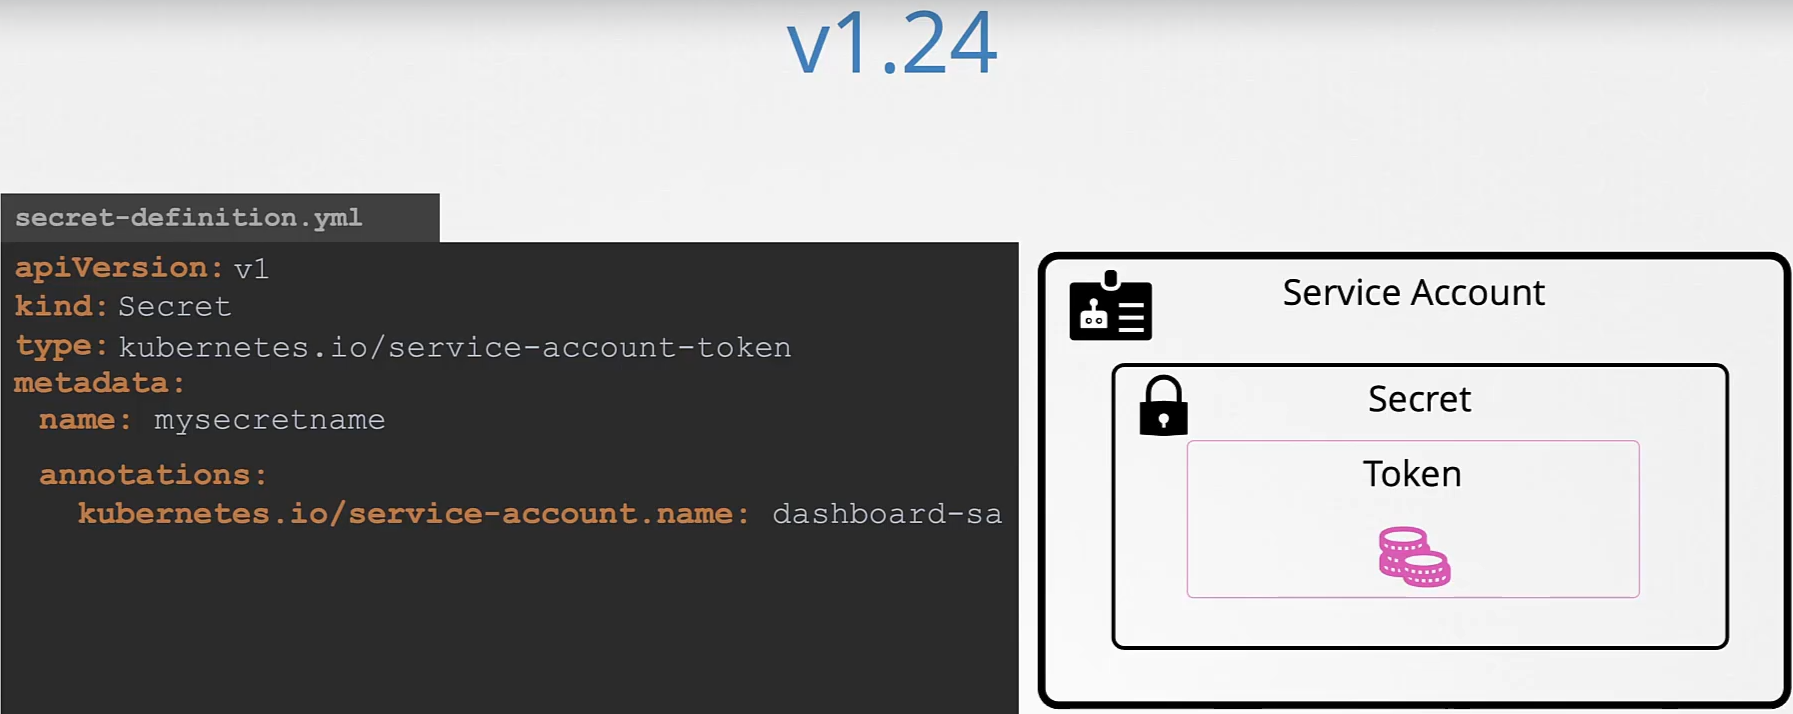
v1.24
예전엔 sa 만들면 토큰도 같이 생성됬지만 이젠 따로 생성해야한다.
이제 토큰에 만기 기간이 뜬다.
secret 도 생성해야한다.
166. Practice Test Service Accounts
1.
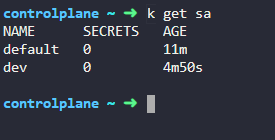
How many Service Accounts exist in the default namespace?
2개
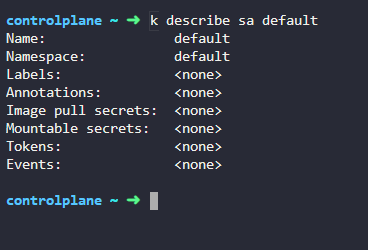
2.
What is the secret token used by the default service account?
none
3.
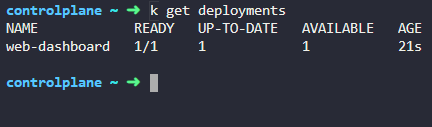
We just deployed the Dashboard application. Inspect the deployment. What is the image used by the deployment?
4.
Wait for the deployment to be ready. Access the custom-dashboard by clicking on the link to dashboard portal.
연결되었다.
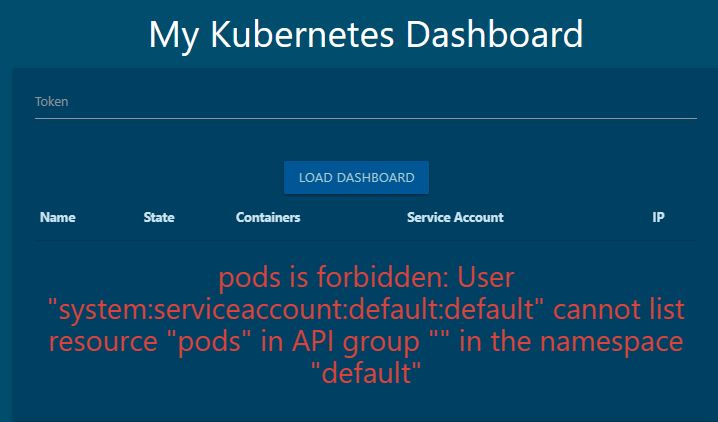
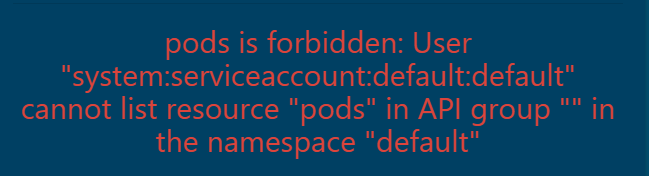
5. What is the state of the dashboard? Have the pod details loaded successfully?
failed
6. What type of account does the Dashboard application use to query the Kubernetes API?
service account 에 연결된다.
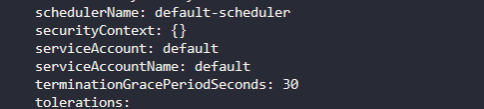
7. Which account does the Dashboard application use to query the Kubernetes API?
default 이다..
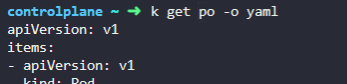
8. Inspect the Dashboard Application POD and identify the Service Account mounted on it.
yaml 열어서 확인
9.
At what location is the ServiceAccount credentials available within the pod?
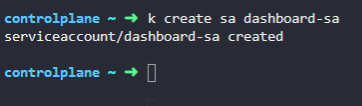
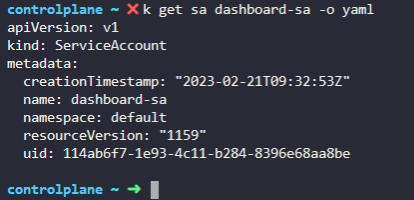
\
10. The application needs a ServiceAccount with the Right permissions to be created to authenticate to Kubernetes. ThedefaultServiceAccount has limited access. Create a new ServiceAccount nameddashboard-sa.
11. We just added additional permissions for the newly createddashboard-saaccount using RBAC.
If you are interested checkout the files used to configure RBAC at/var/rbac. We will discuss RBAC in a separate section.
Ok
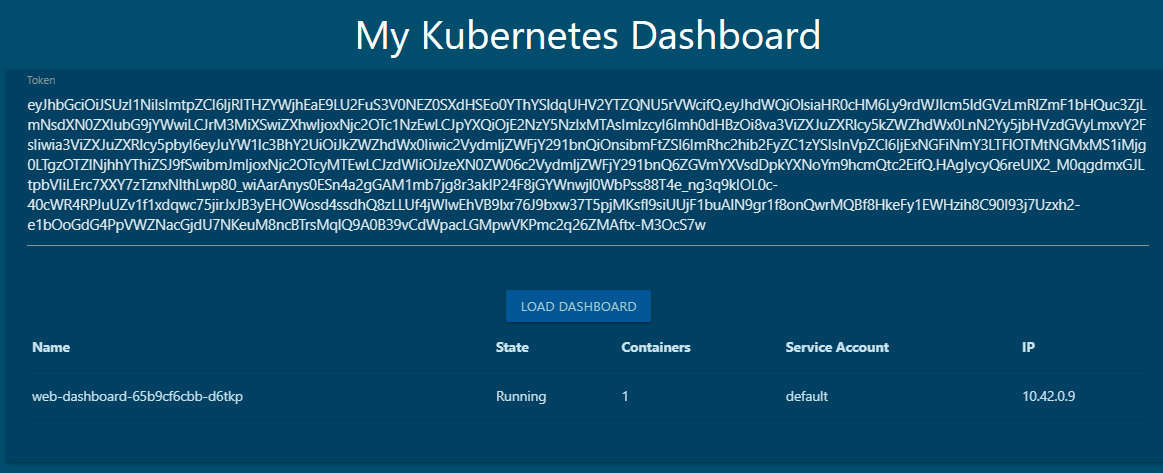
12. Enter the access token in the UI of the dashboard application. ClickLoad Dashboardbutton to load Dashboard
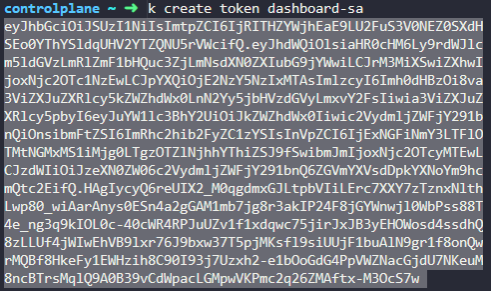
Create an authorization token for the newly created service account, copy the generated token and paste it into thetokenfield of the UI.
To do this, runkubectl create token dashboard-safor thedashboard-saservice account, copy the token and paste it in the UI.
복붙하기
13.
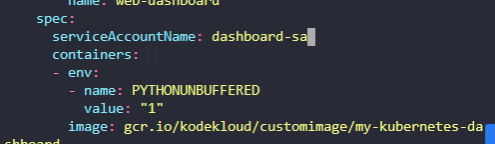
You shouldn't have to copy and paste the token each time. The Dashboard application is programmed to read token from the secret mount location. However currently, thedefaultservice account is mounted. Update the deployment to use the newly created ServiceAccount
Edit the deployment to change ServiceAccount fromdefaulttodashboard-sa.
sa 다시 붙이기
디플로이먼트에서 변경
14. Refresh the Dashboard application UI and you should now see the PODs listed automatically.